Guide: Microsoft Entra SSO Integration With Argo CD
Configure Argo CD single sign-on using Microsoft Entra as the OIDC identity provider. This guide covers registering the Microsoft Entra application, mapping Entra groups to Argo CD RBAC roles, and updating the Argo CD Helm chart — the same platform-access pattern used for the AWS EKS cluster and KubeRocketCI Portal.
Prerequisites for Argo CD SSO with Microsoft Entra
Before you begin, make sure the following prerequisites are met:
- Access to the Microsoft Entra Admin Center with administrative privileges.
- Microsoft Entra Tenant is created.
- Argo CD is installed (can be installed during Configuring Helm chart step).
- A forked copy of the edp-cluster-add-ons repository is created.
- (Optional) External Secrets Operator is installed.
Registering the Argo CD Application in Microsoft Entra
To configure Microsoft Entra as the Identity Provider for the Argo CD, it is necessary to create and configure an Application in the Microsoft Entra Admin Center:
-
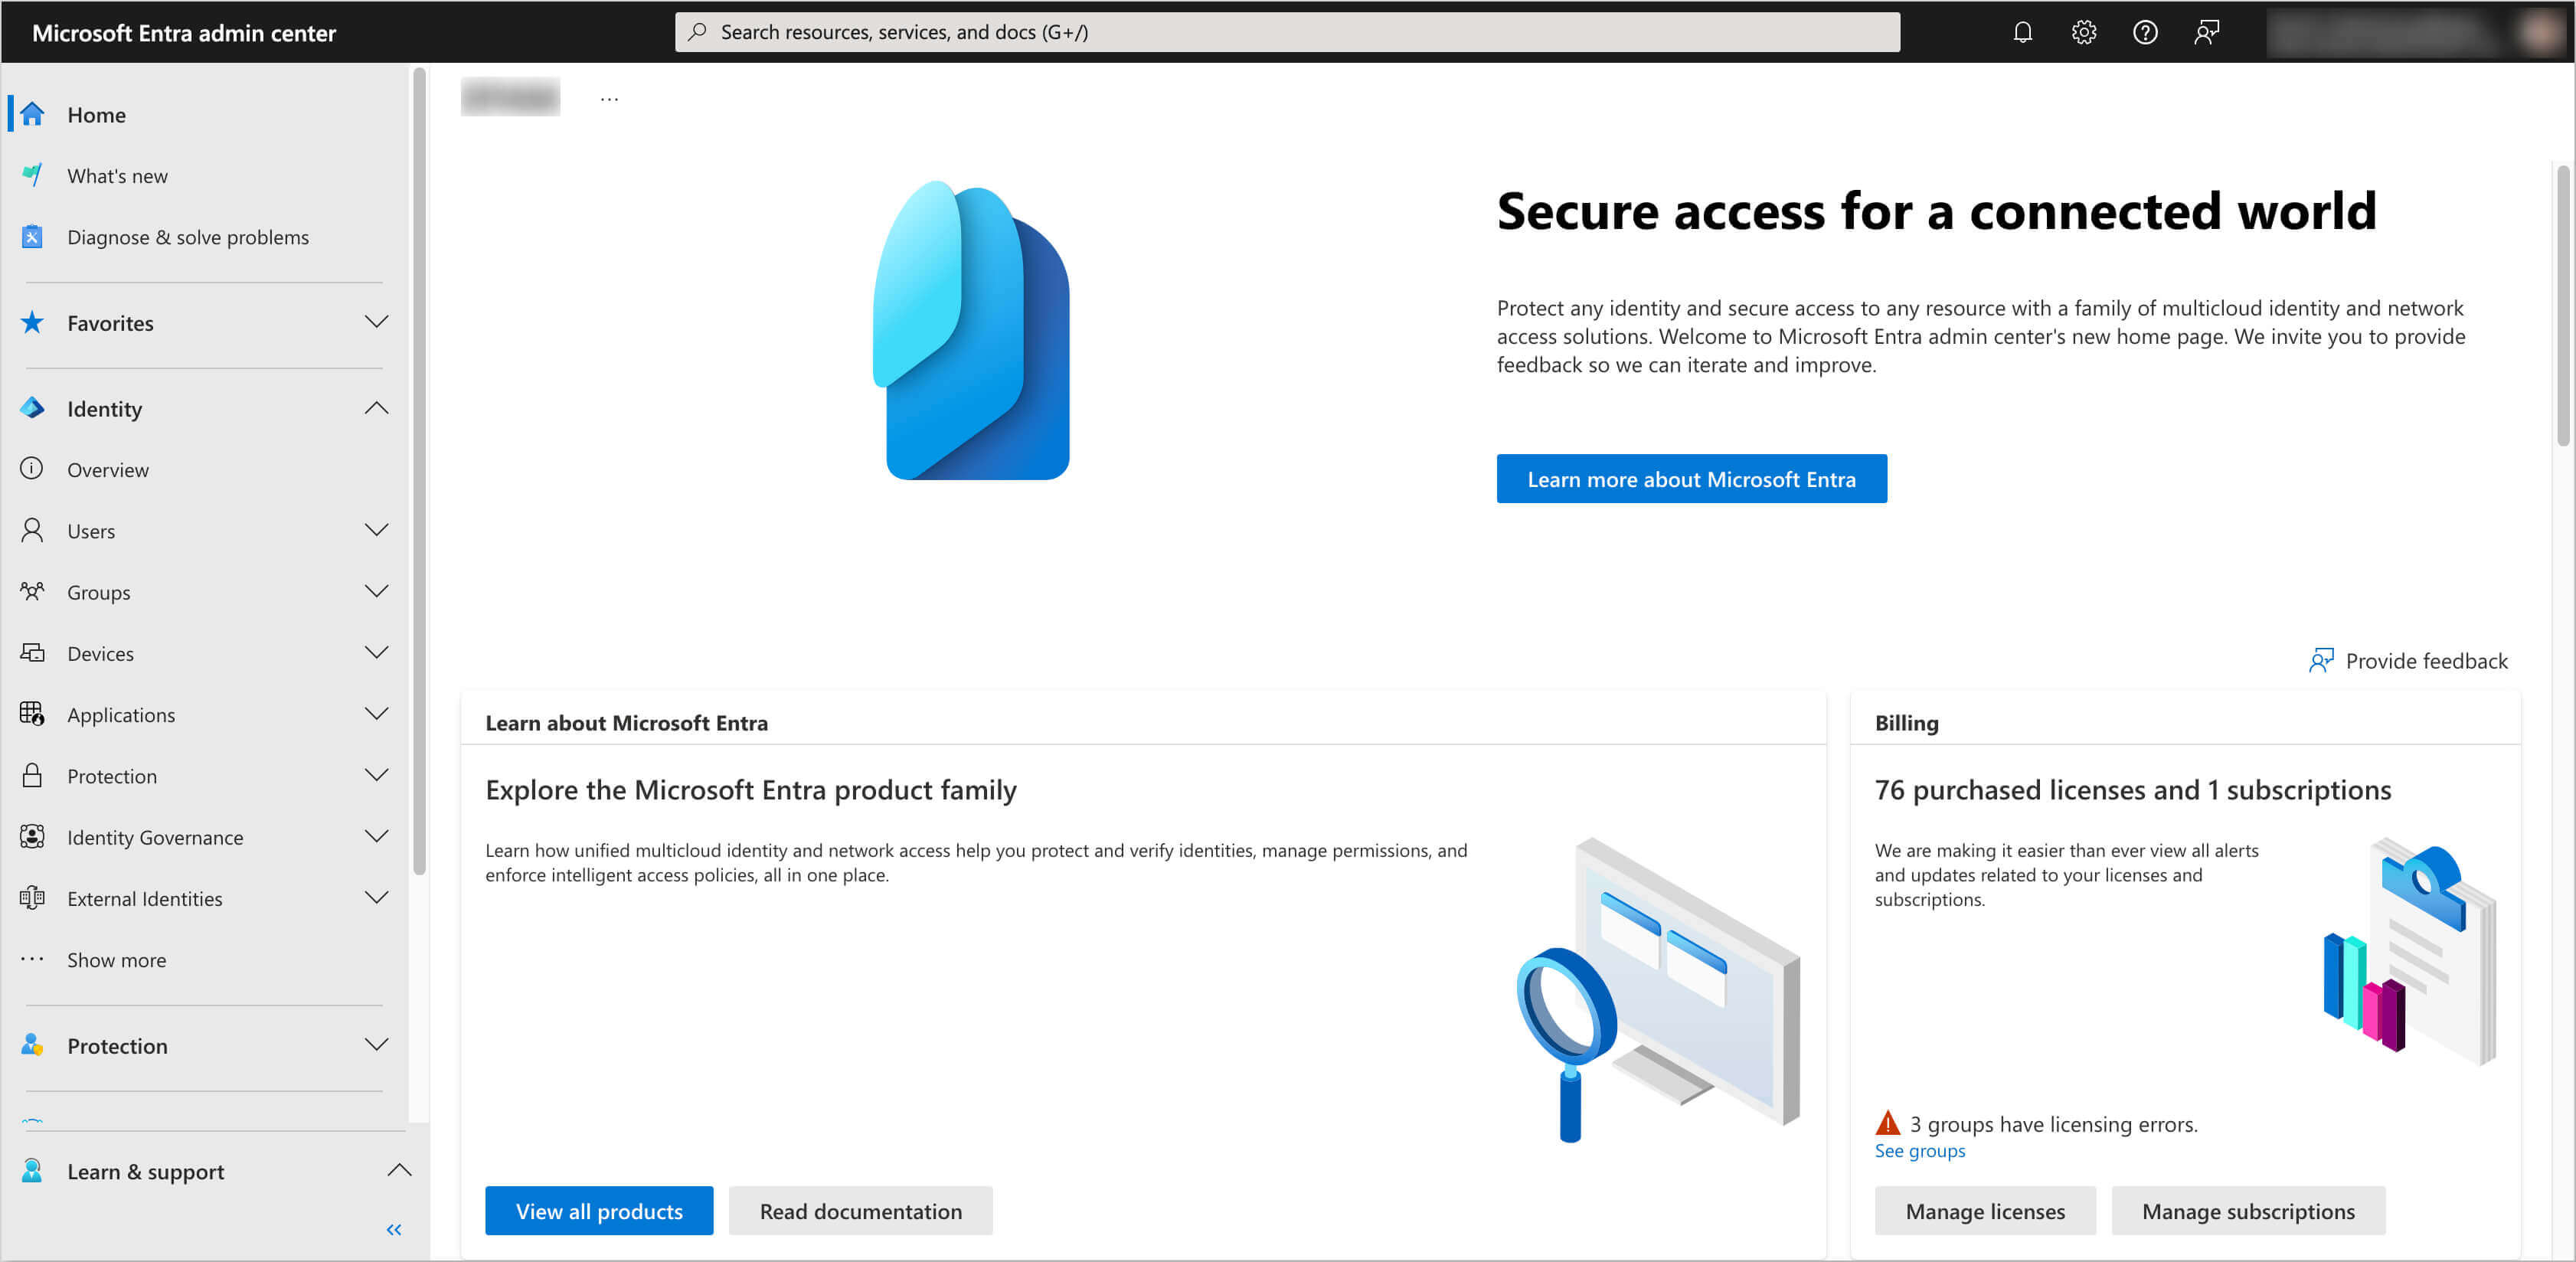
Log in to the Microsoft Entra Admin Center:
-
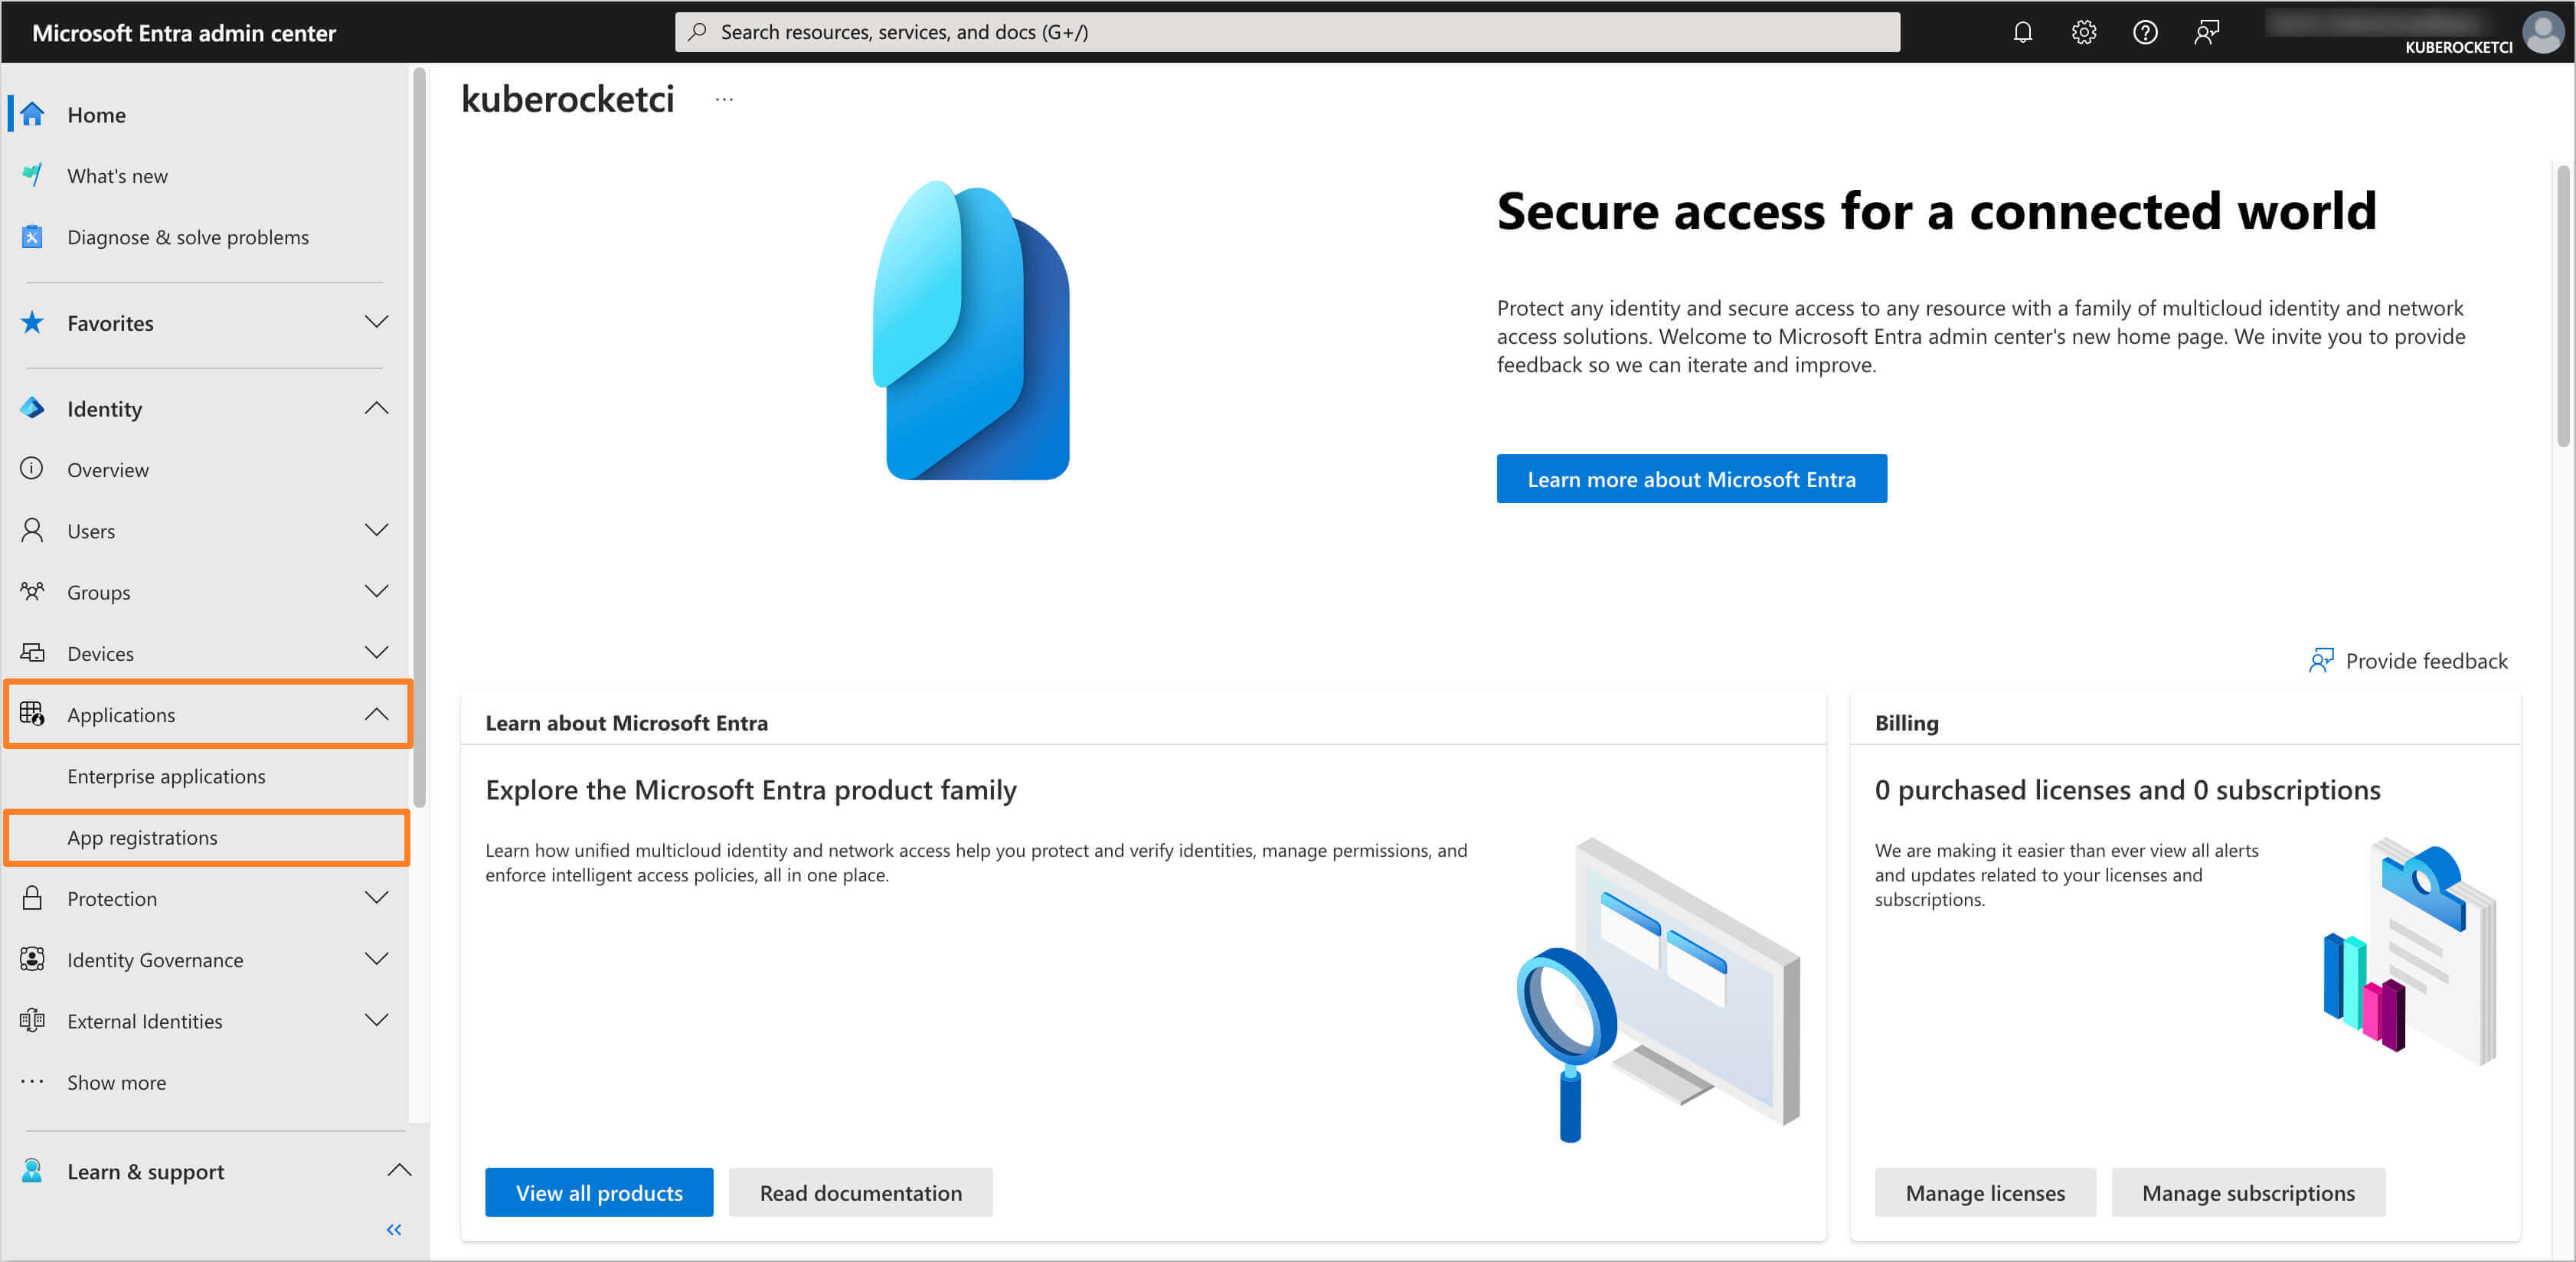
In the left sidebar menu, select Applications and click App registrations:
-
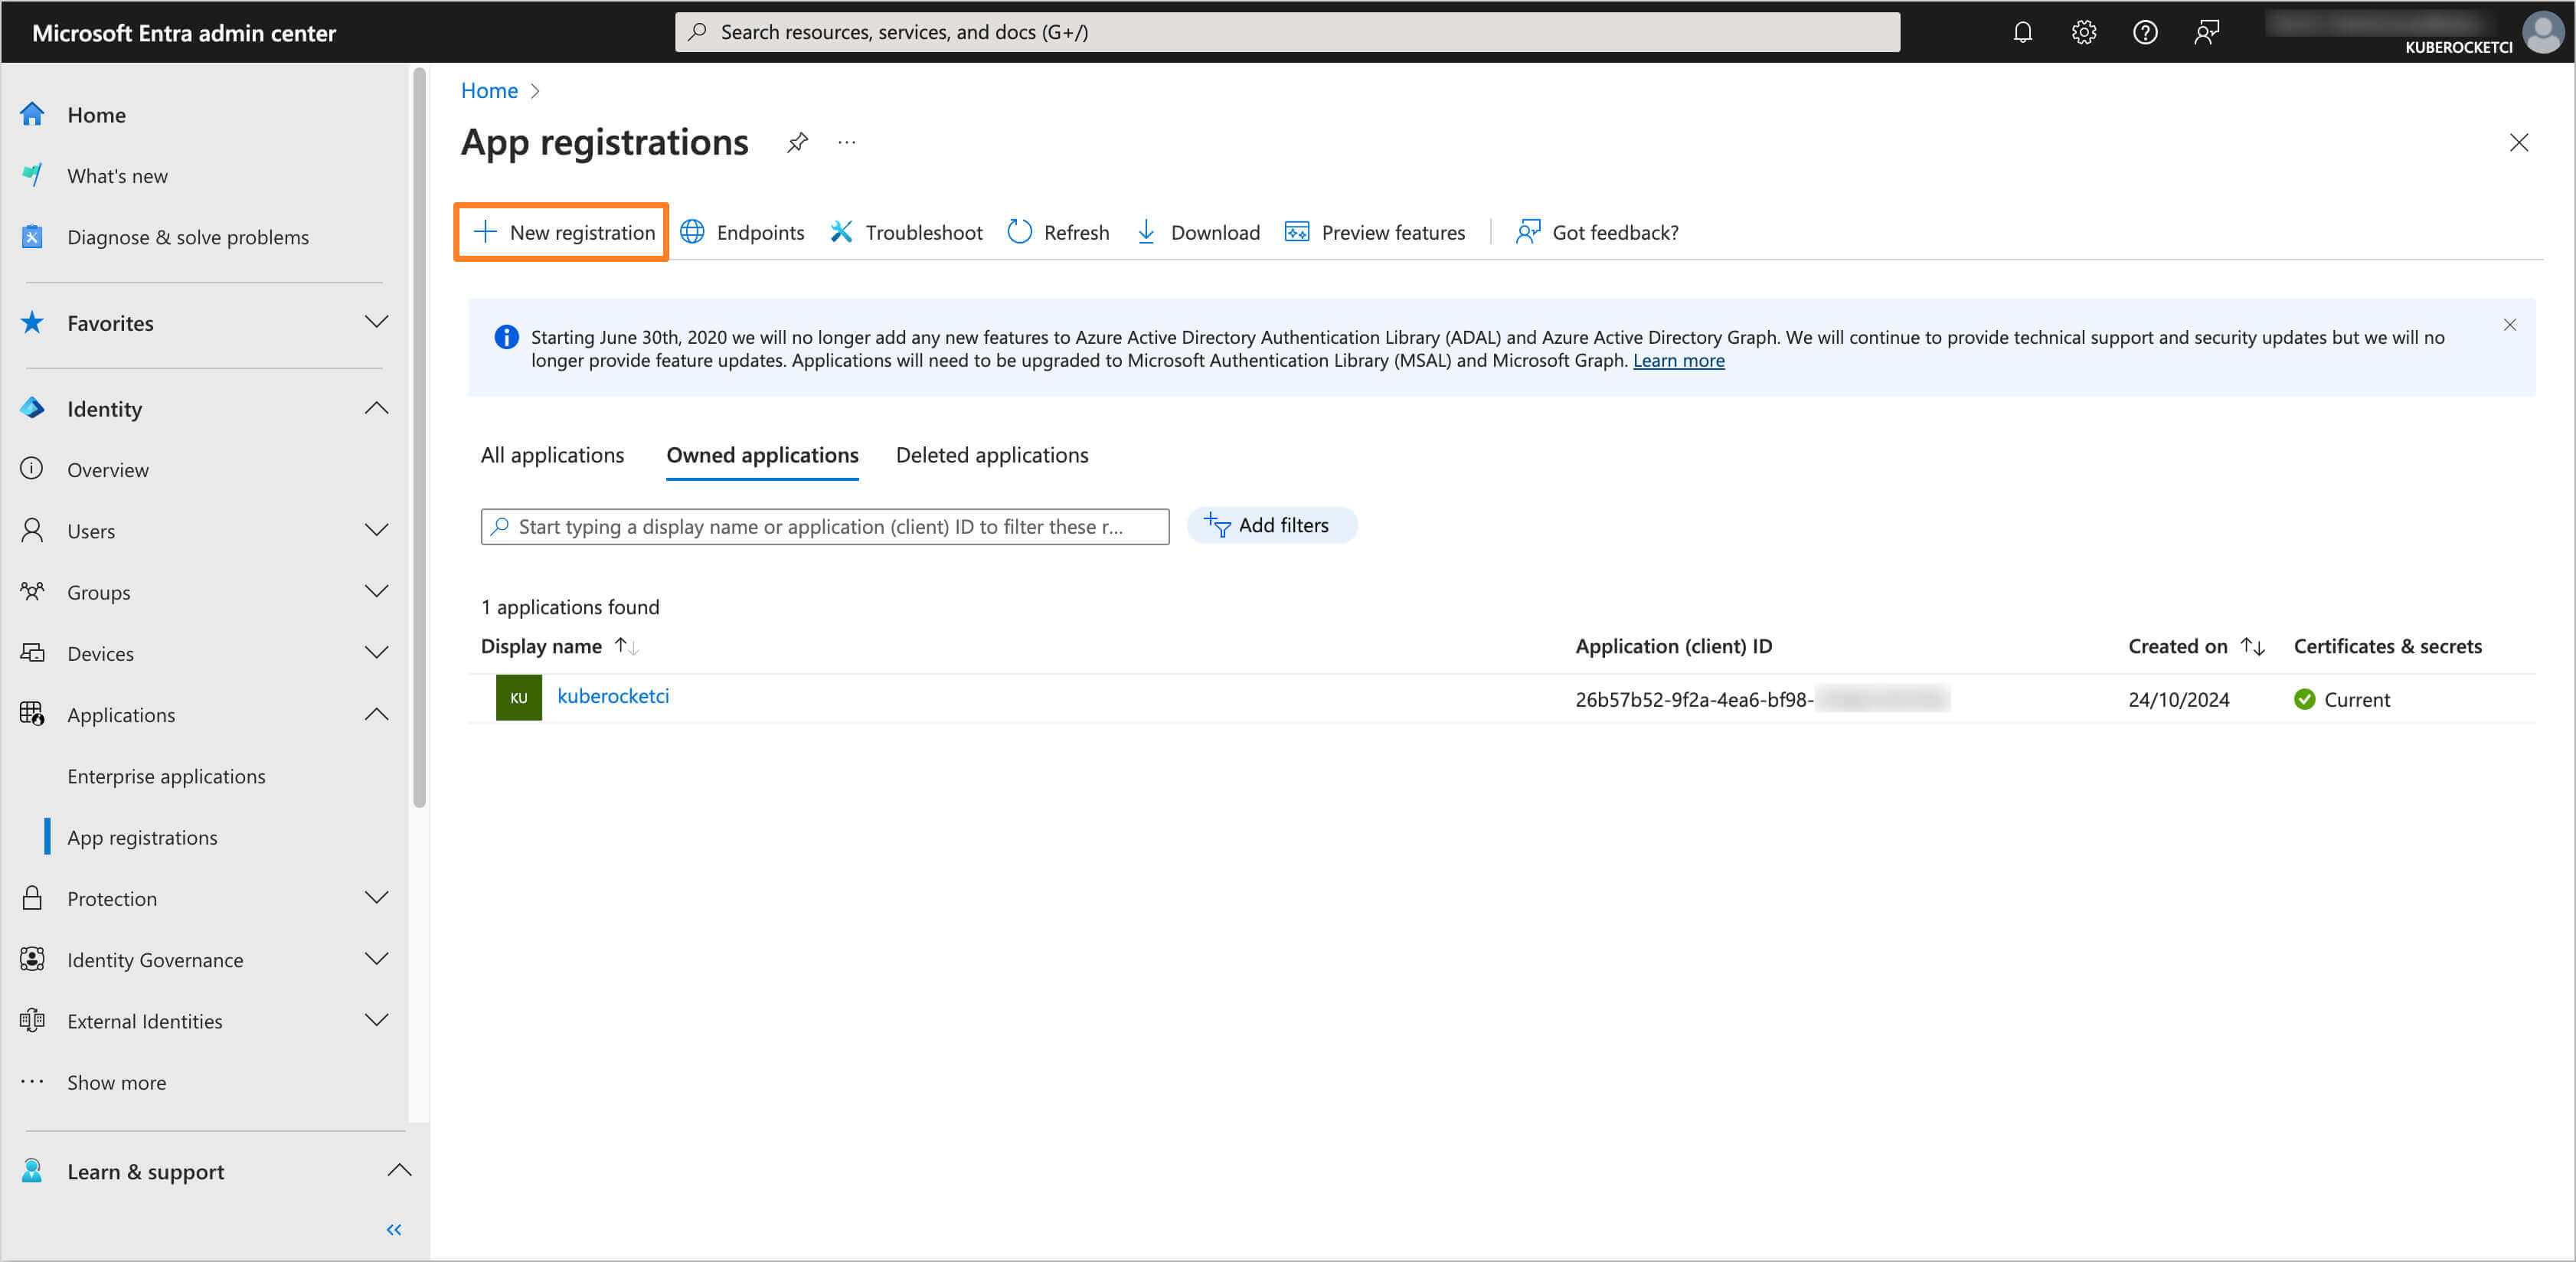
Click on the New registration button:
-
Fill in the required fields, such as Name, Supported account types and Redirect URI (you can skip setting the Redirect URI if you don't deploy Argo CD yet). Click Register to create the application:
noteThe Redirect URI should be in the format
https://<Argo CD URL>/auth/callback.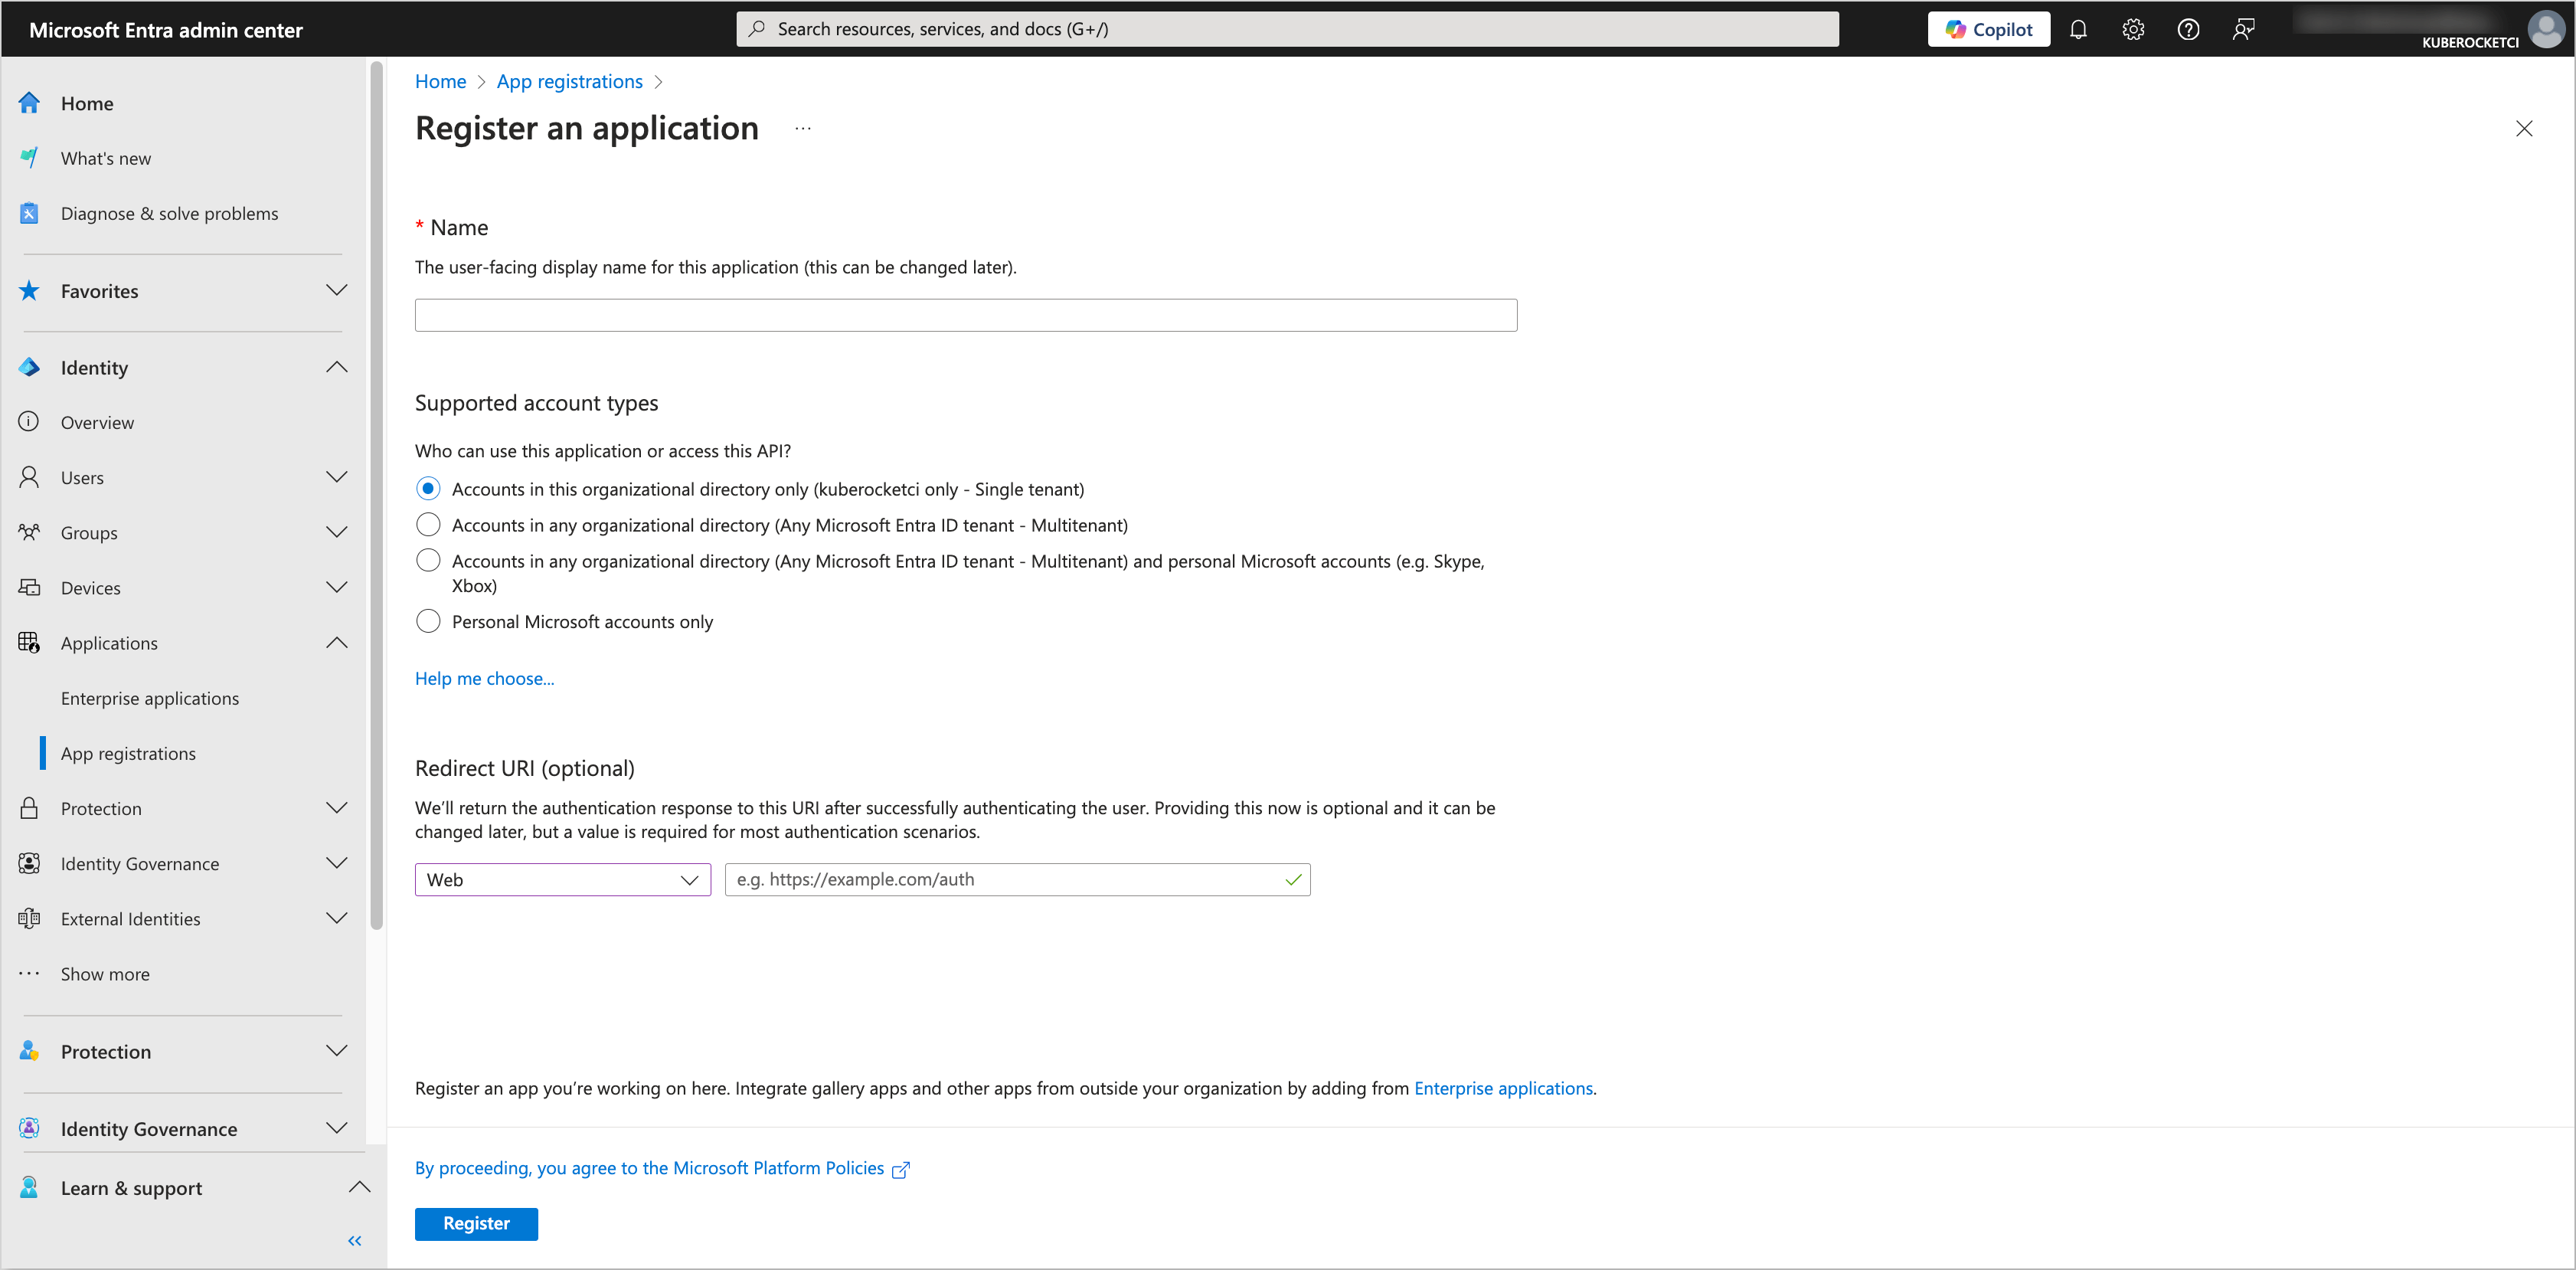
-
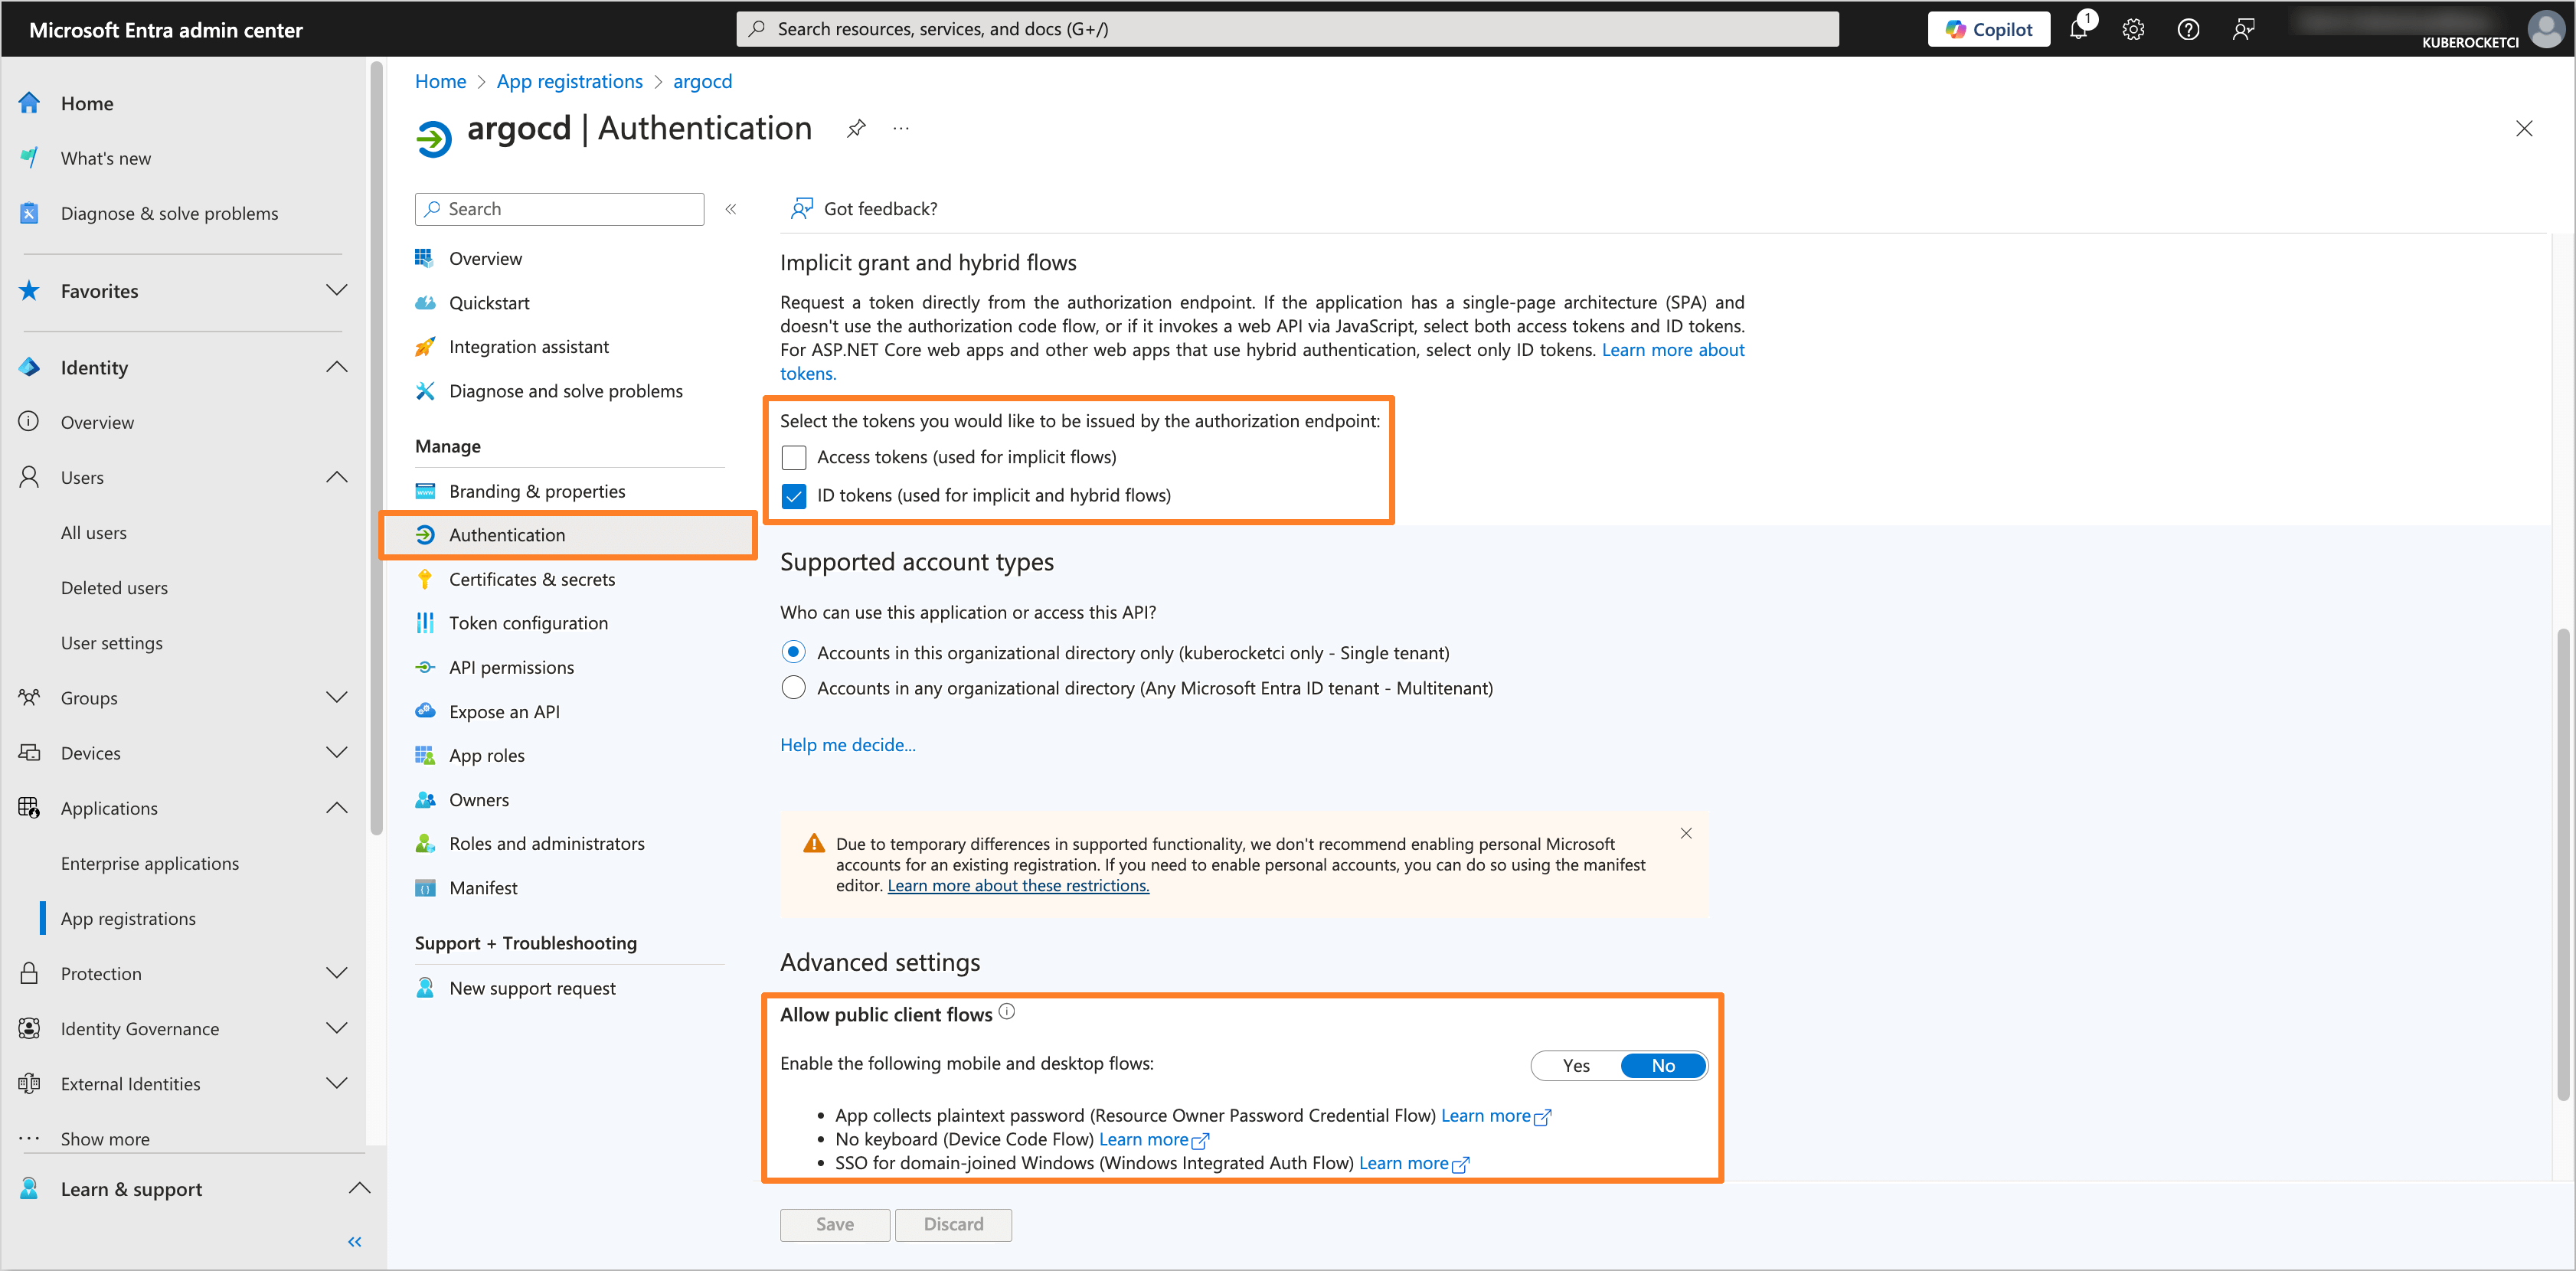
In the created application, navigate to the Authentication section from the left sidebar menu. In the Implicit grant and hybrid flows section, select ID tokens for the token type. In the Allow public client flows section, set the value to No:
-
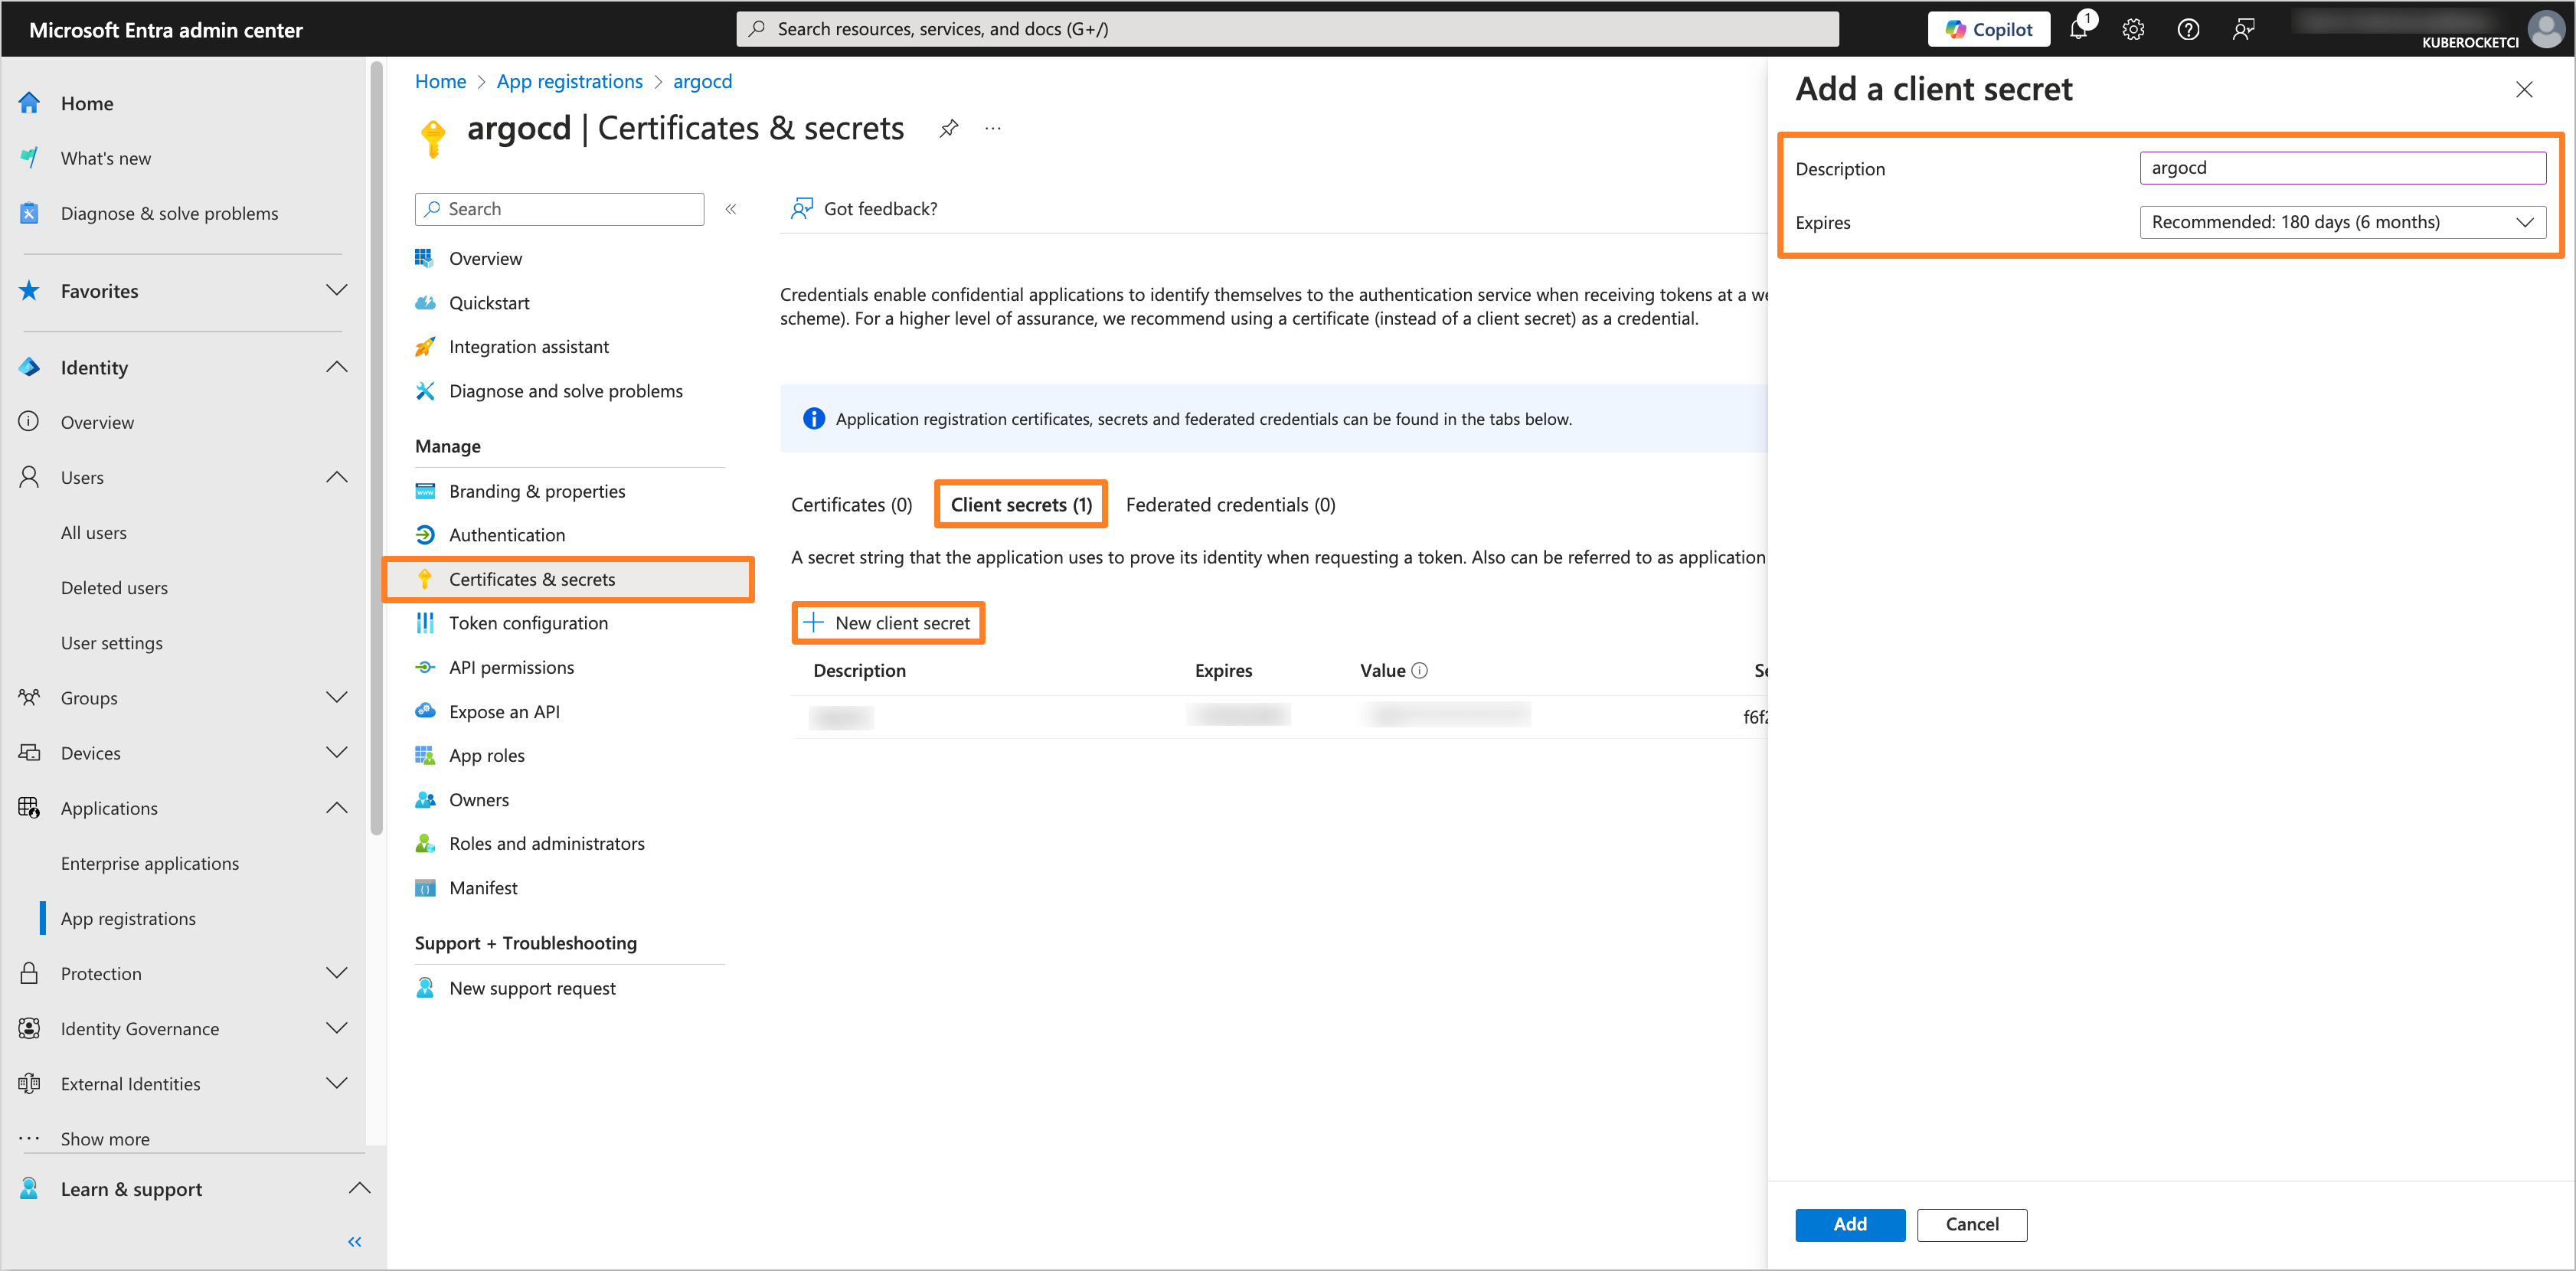
Navigate to the Certificates & secrets section. In the Client secrets tab, click on the New client secret button to create a new secret. Fill in the required fields and click Add:
-
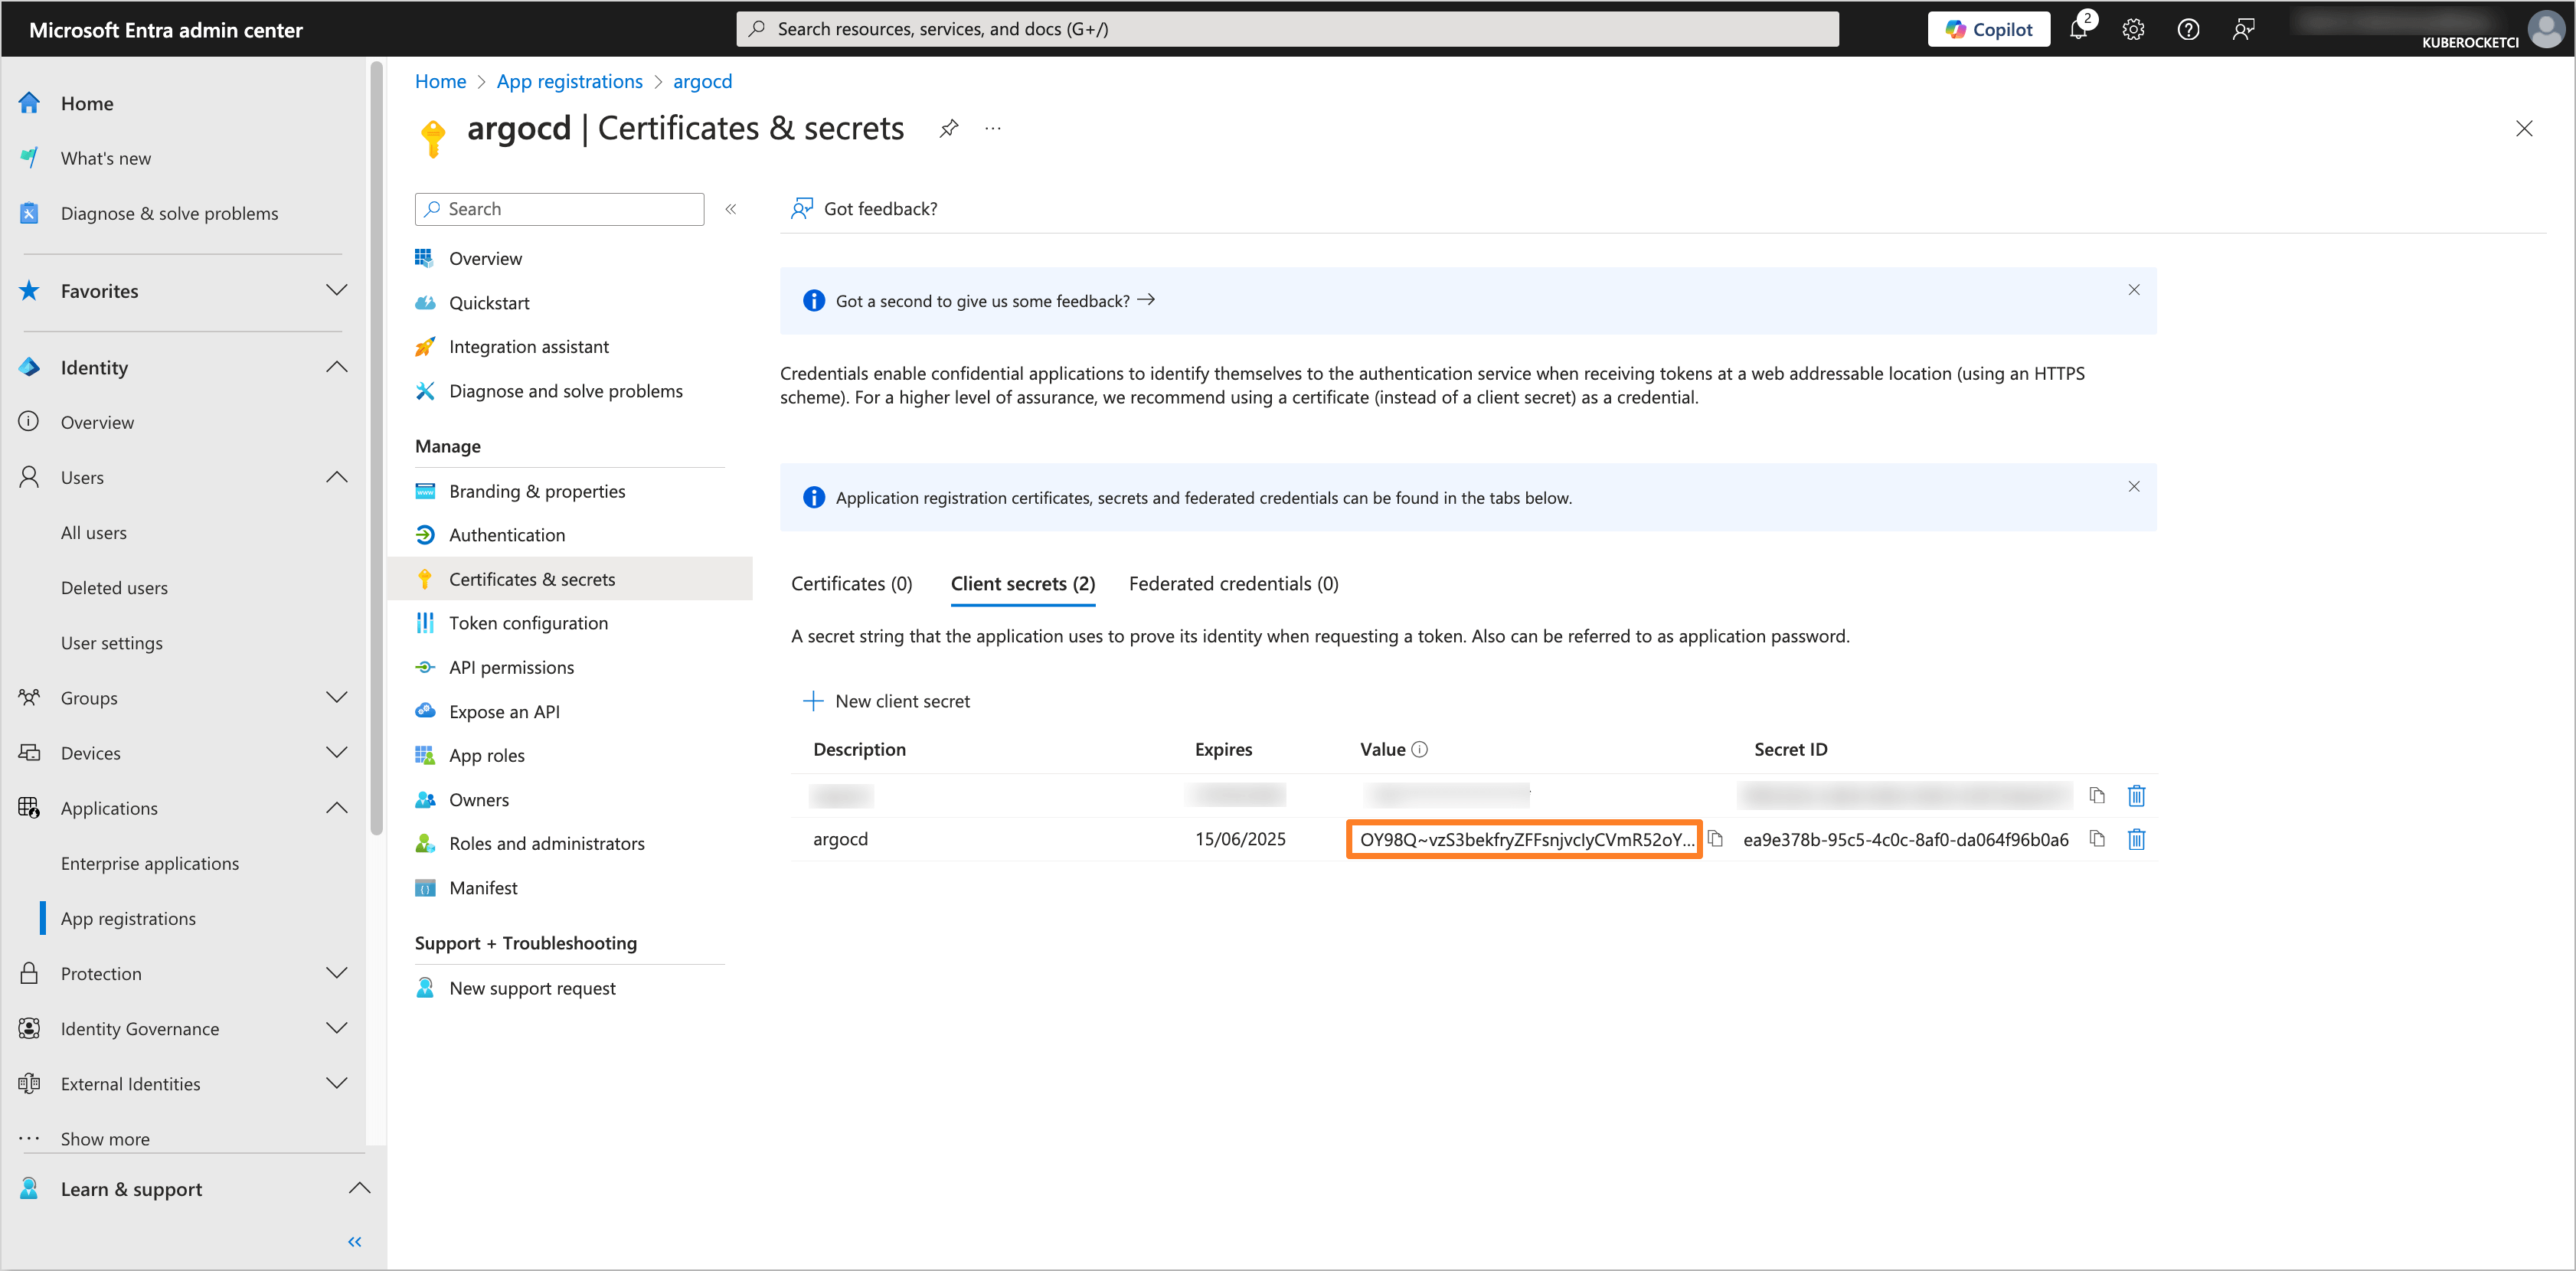
Copy the generated client secret value and store it securely. You will need this value to configure the Argo CD Helm chart:
-
Navigate to the Token configuration section and click on Add group claim button. Choose the group type as Security Groups and for the ID token type, select Group ID:
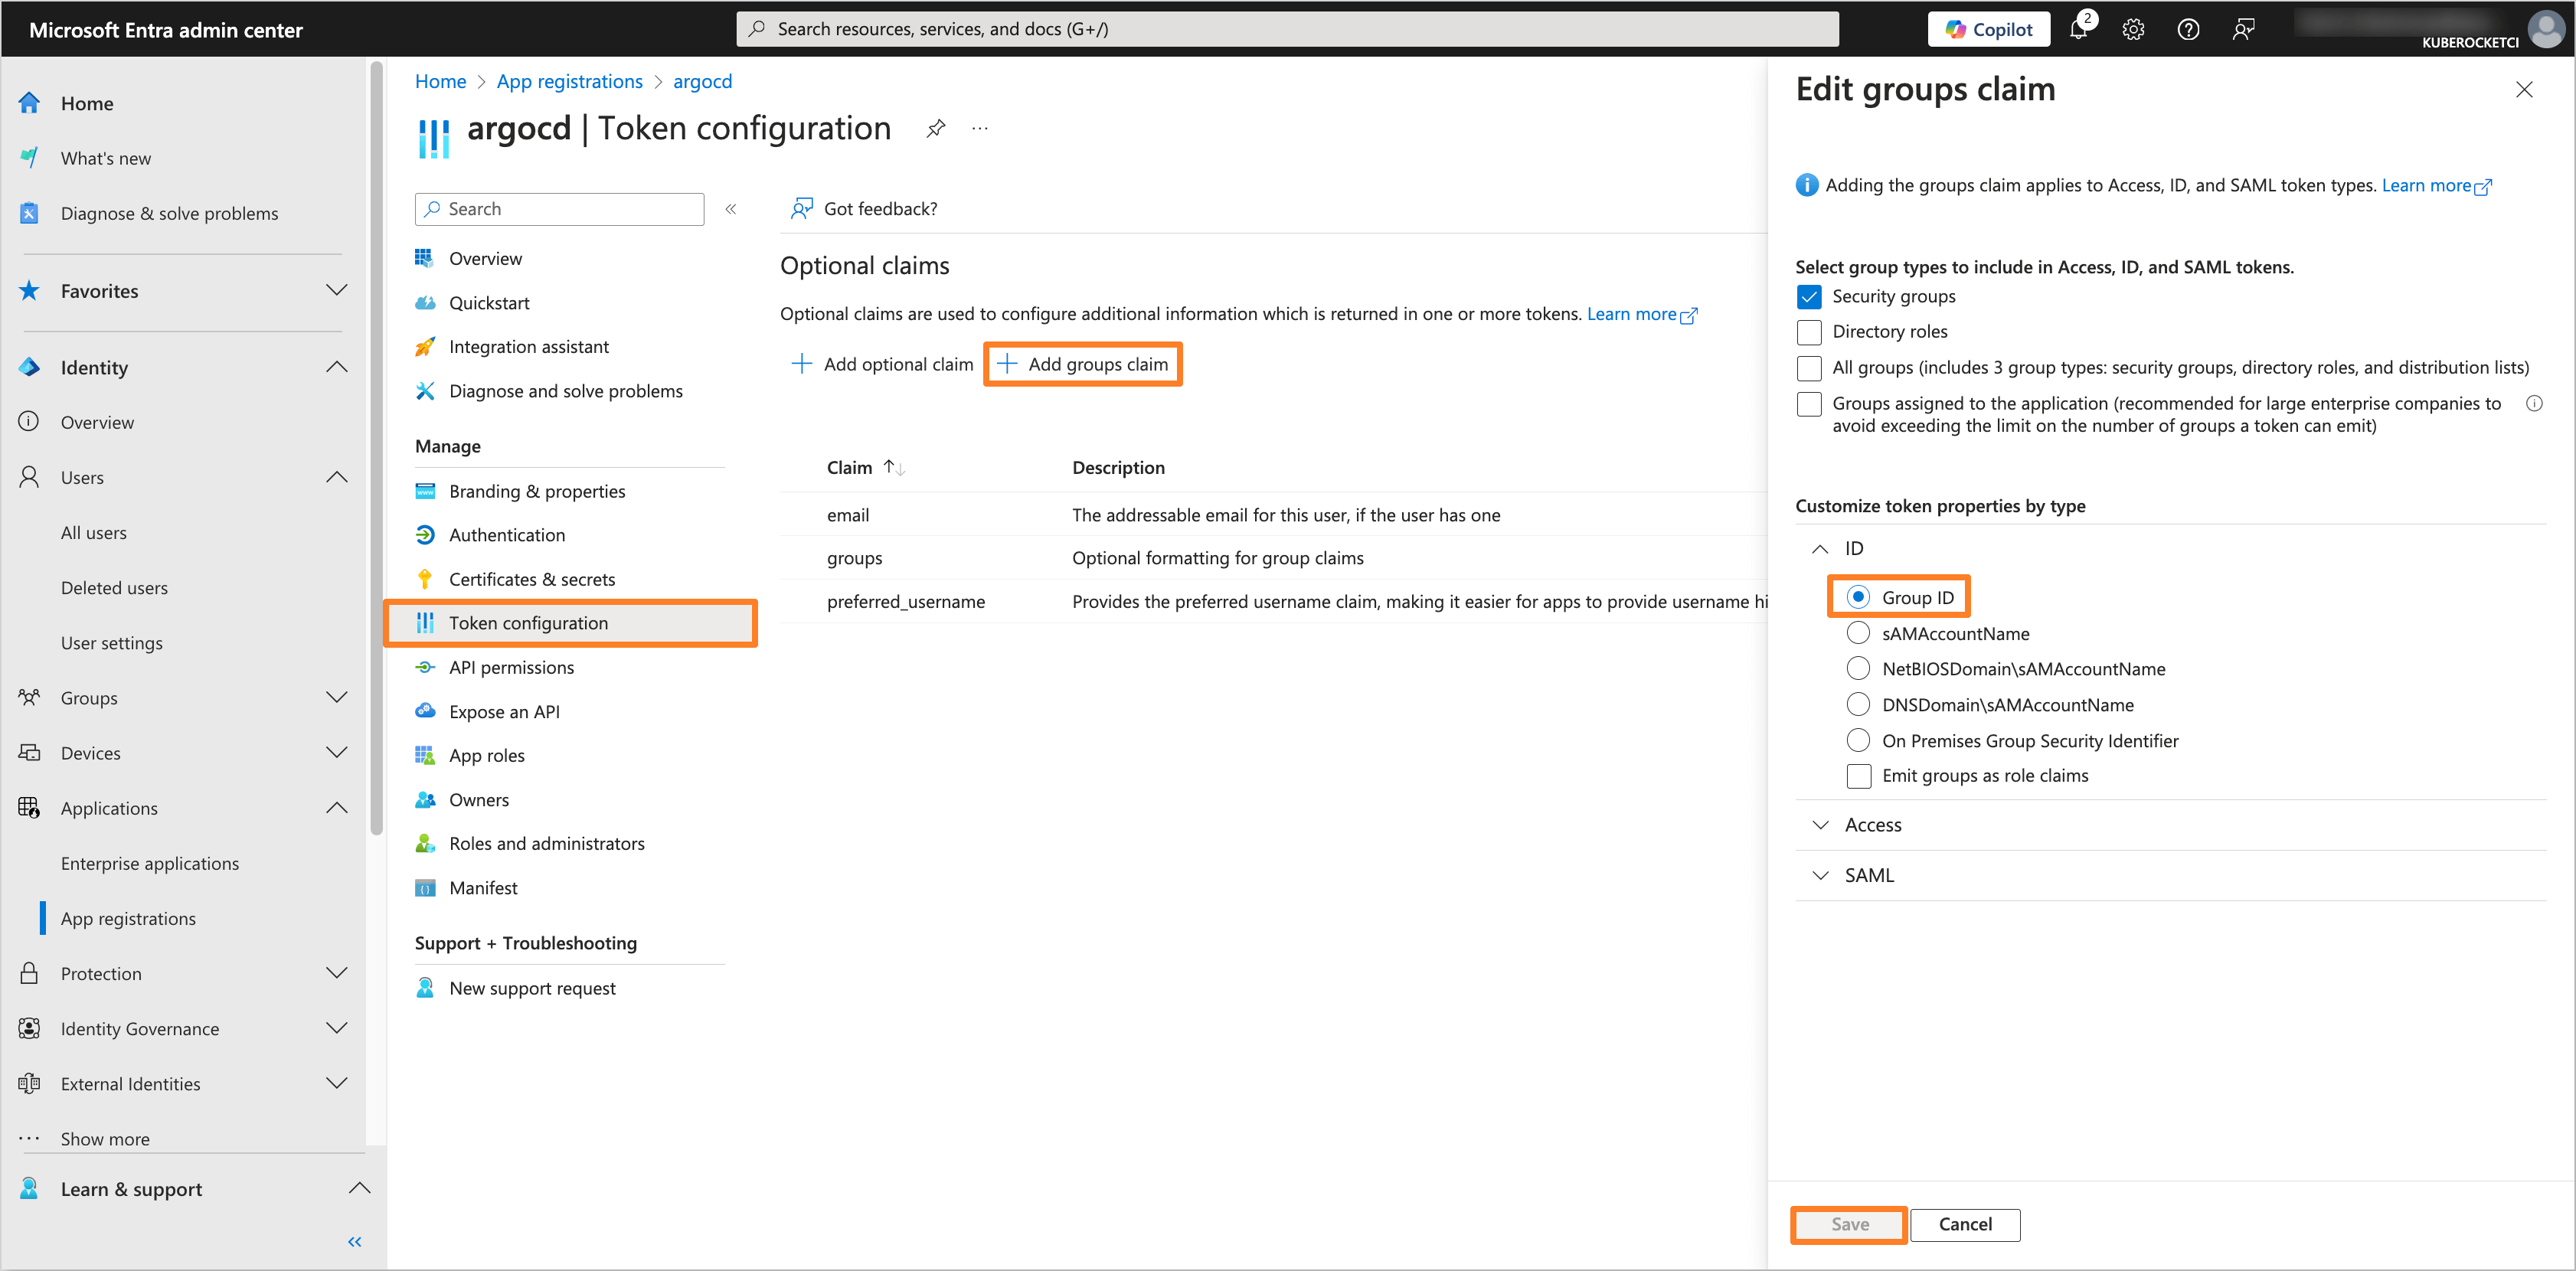
Also, add the preferred_username and email optional claims:
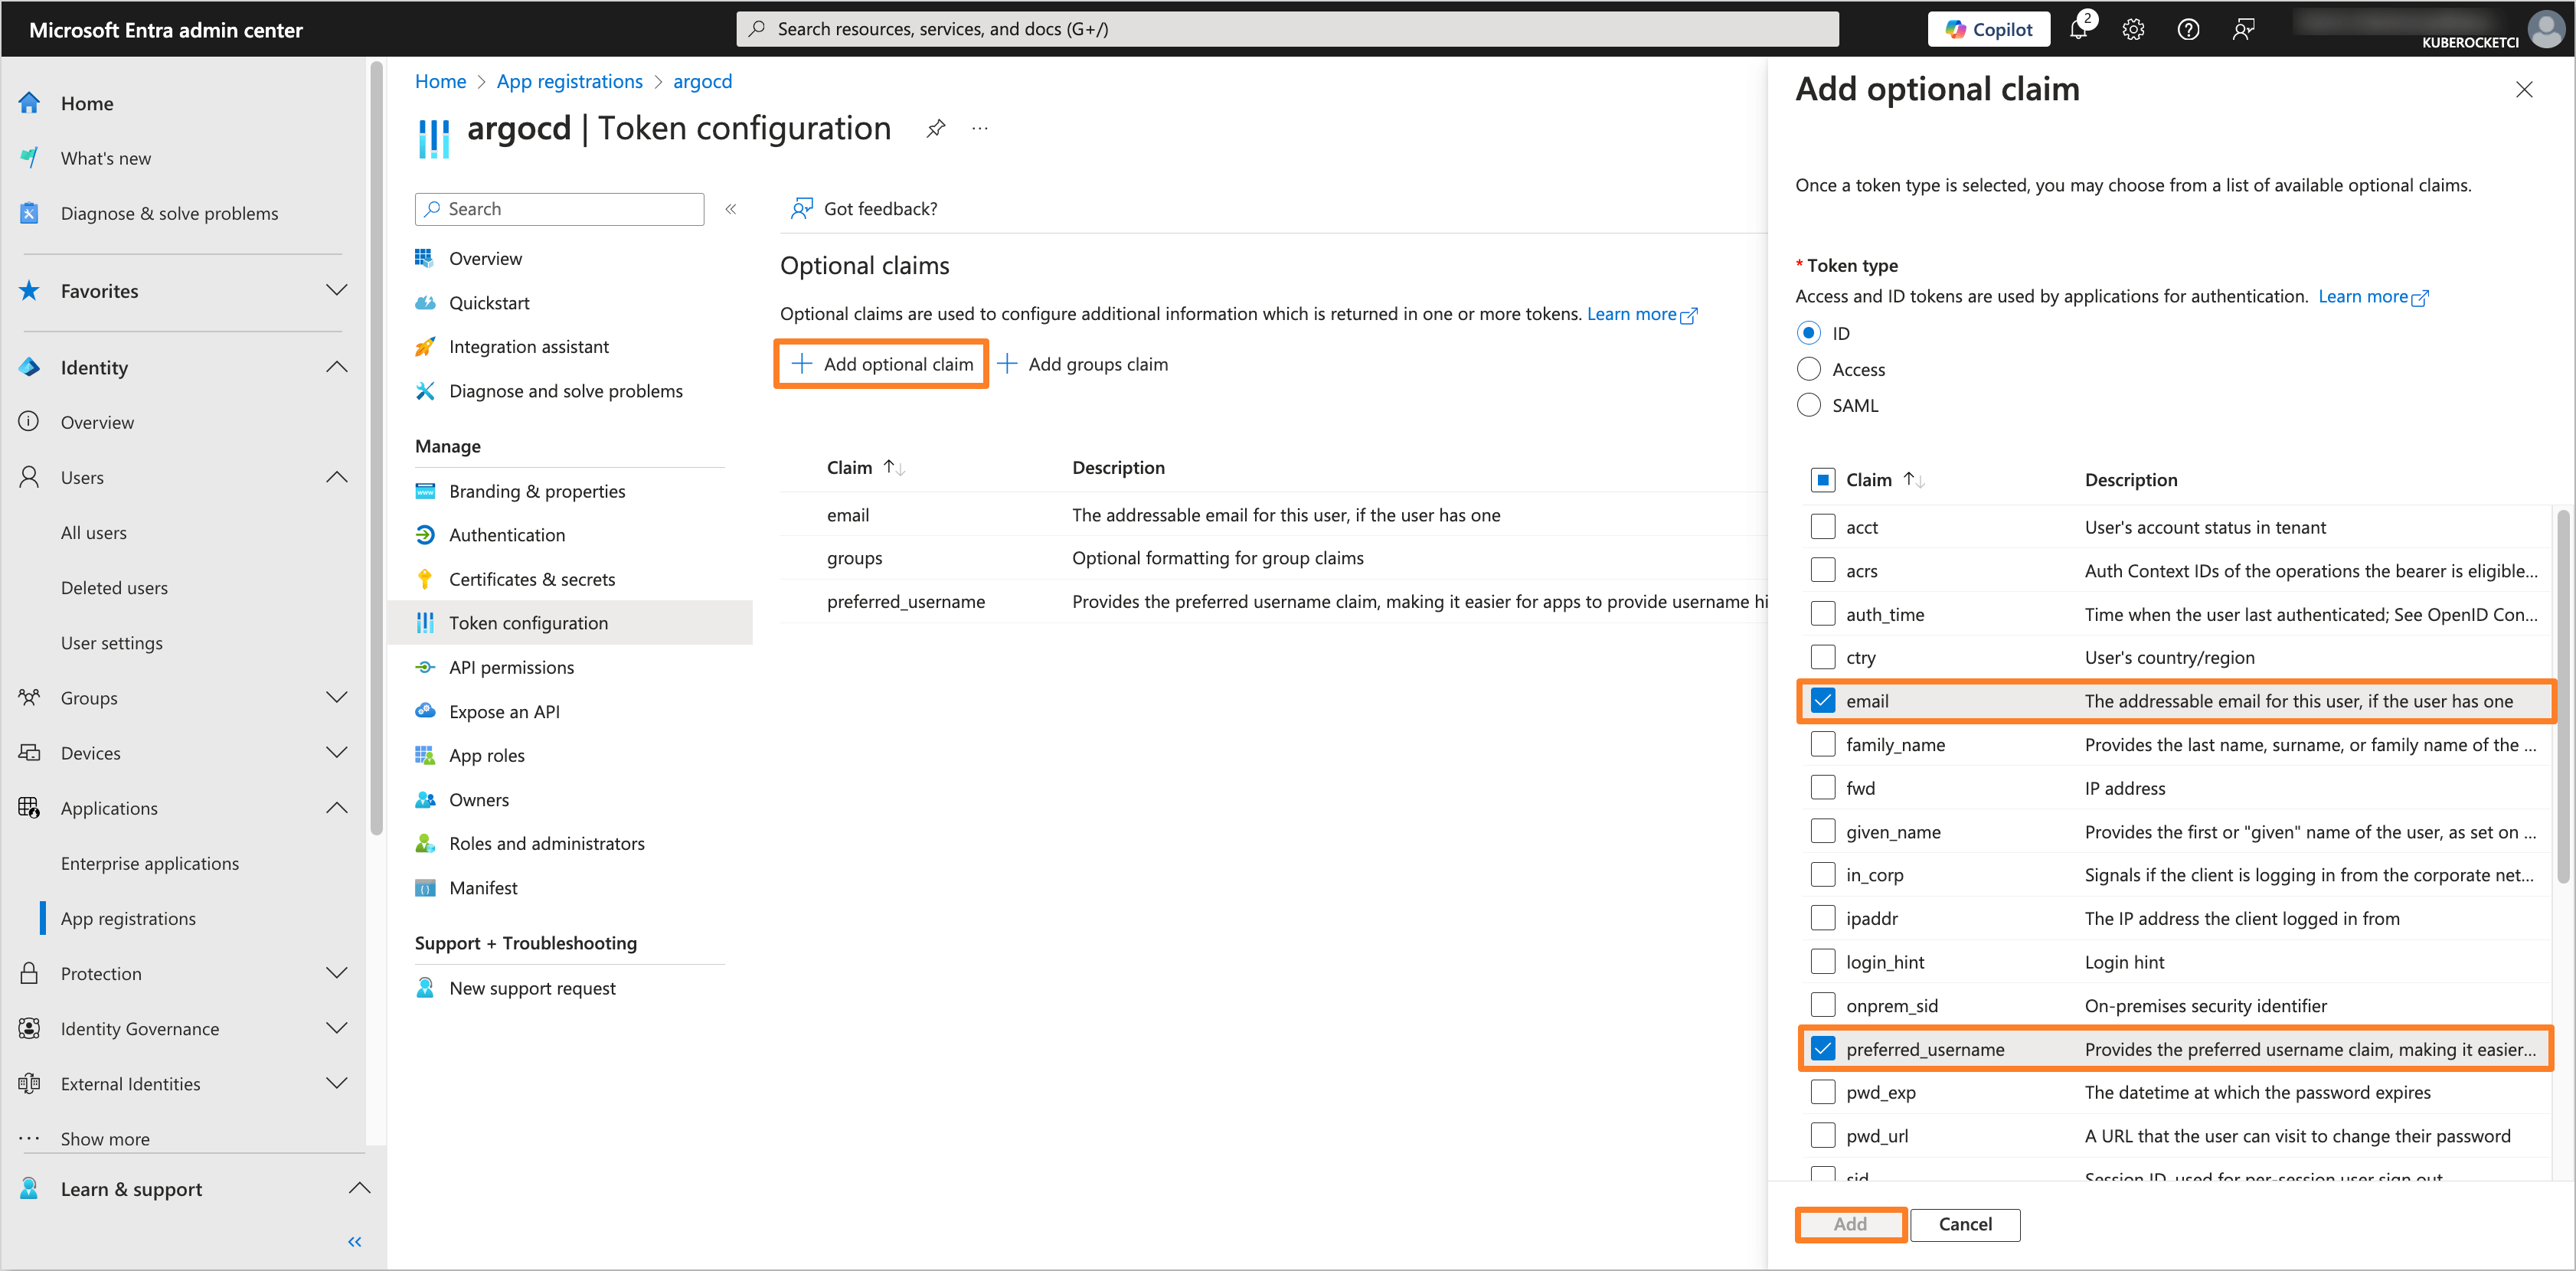
-
Navigate to the API permissions section. Click on the Add a permission button. Select Microsoft Graph and then Delegated permissions. Add the following permissions:
- openid
- profile
- User.Read
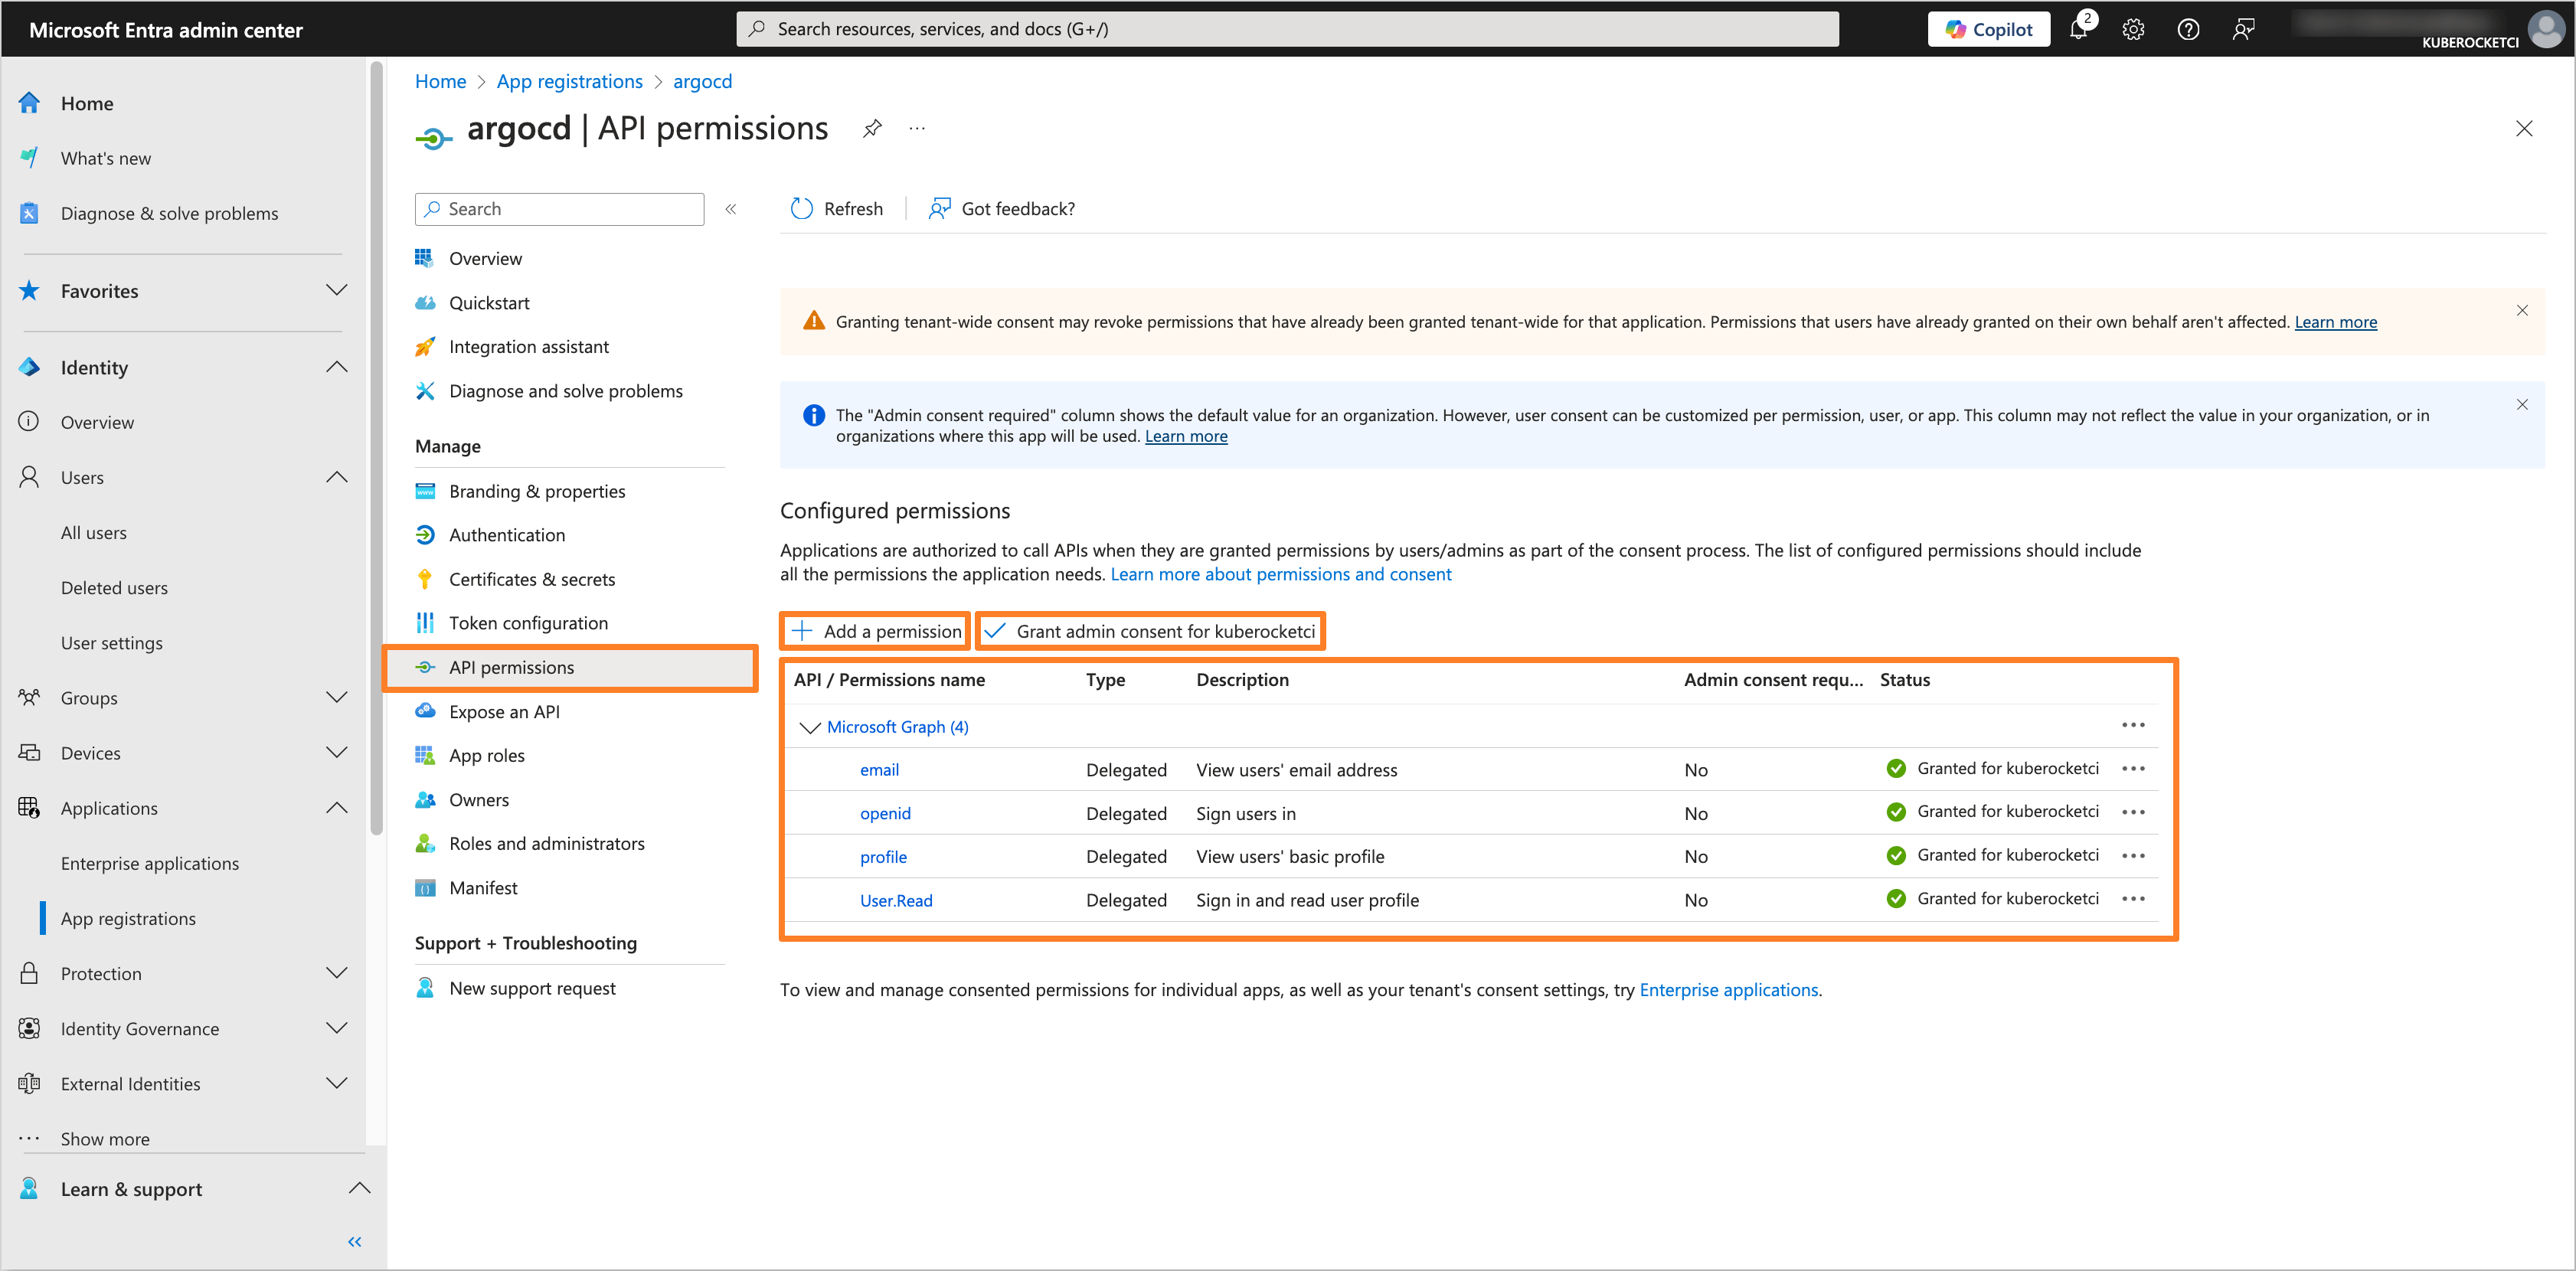
After adding the permissions, click on the Grant admin consent for 'Tenant name' button to grant the required permissions.
Creating the Groups
To manage access to the Argo CD, it is necessary to create groups in the Microsoft Entra Admin Center and assign users to them.
-
In the Microsoft Entra Admin Center, in the left sidebar menu, select Groups and then All groups. Click on New group button to create a new group(s) for users who will have access to Argo CD (e.g.,
ArgoCDAdmins,ArgoCDReadOnly, etc.):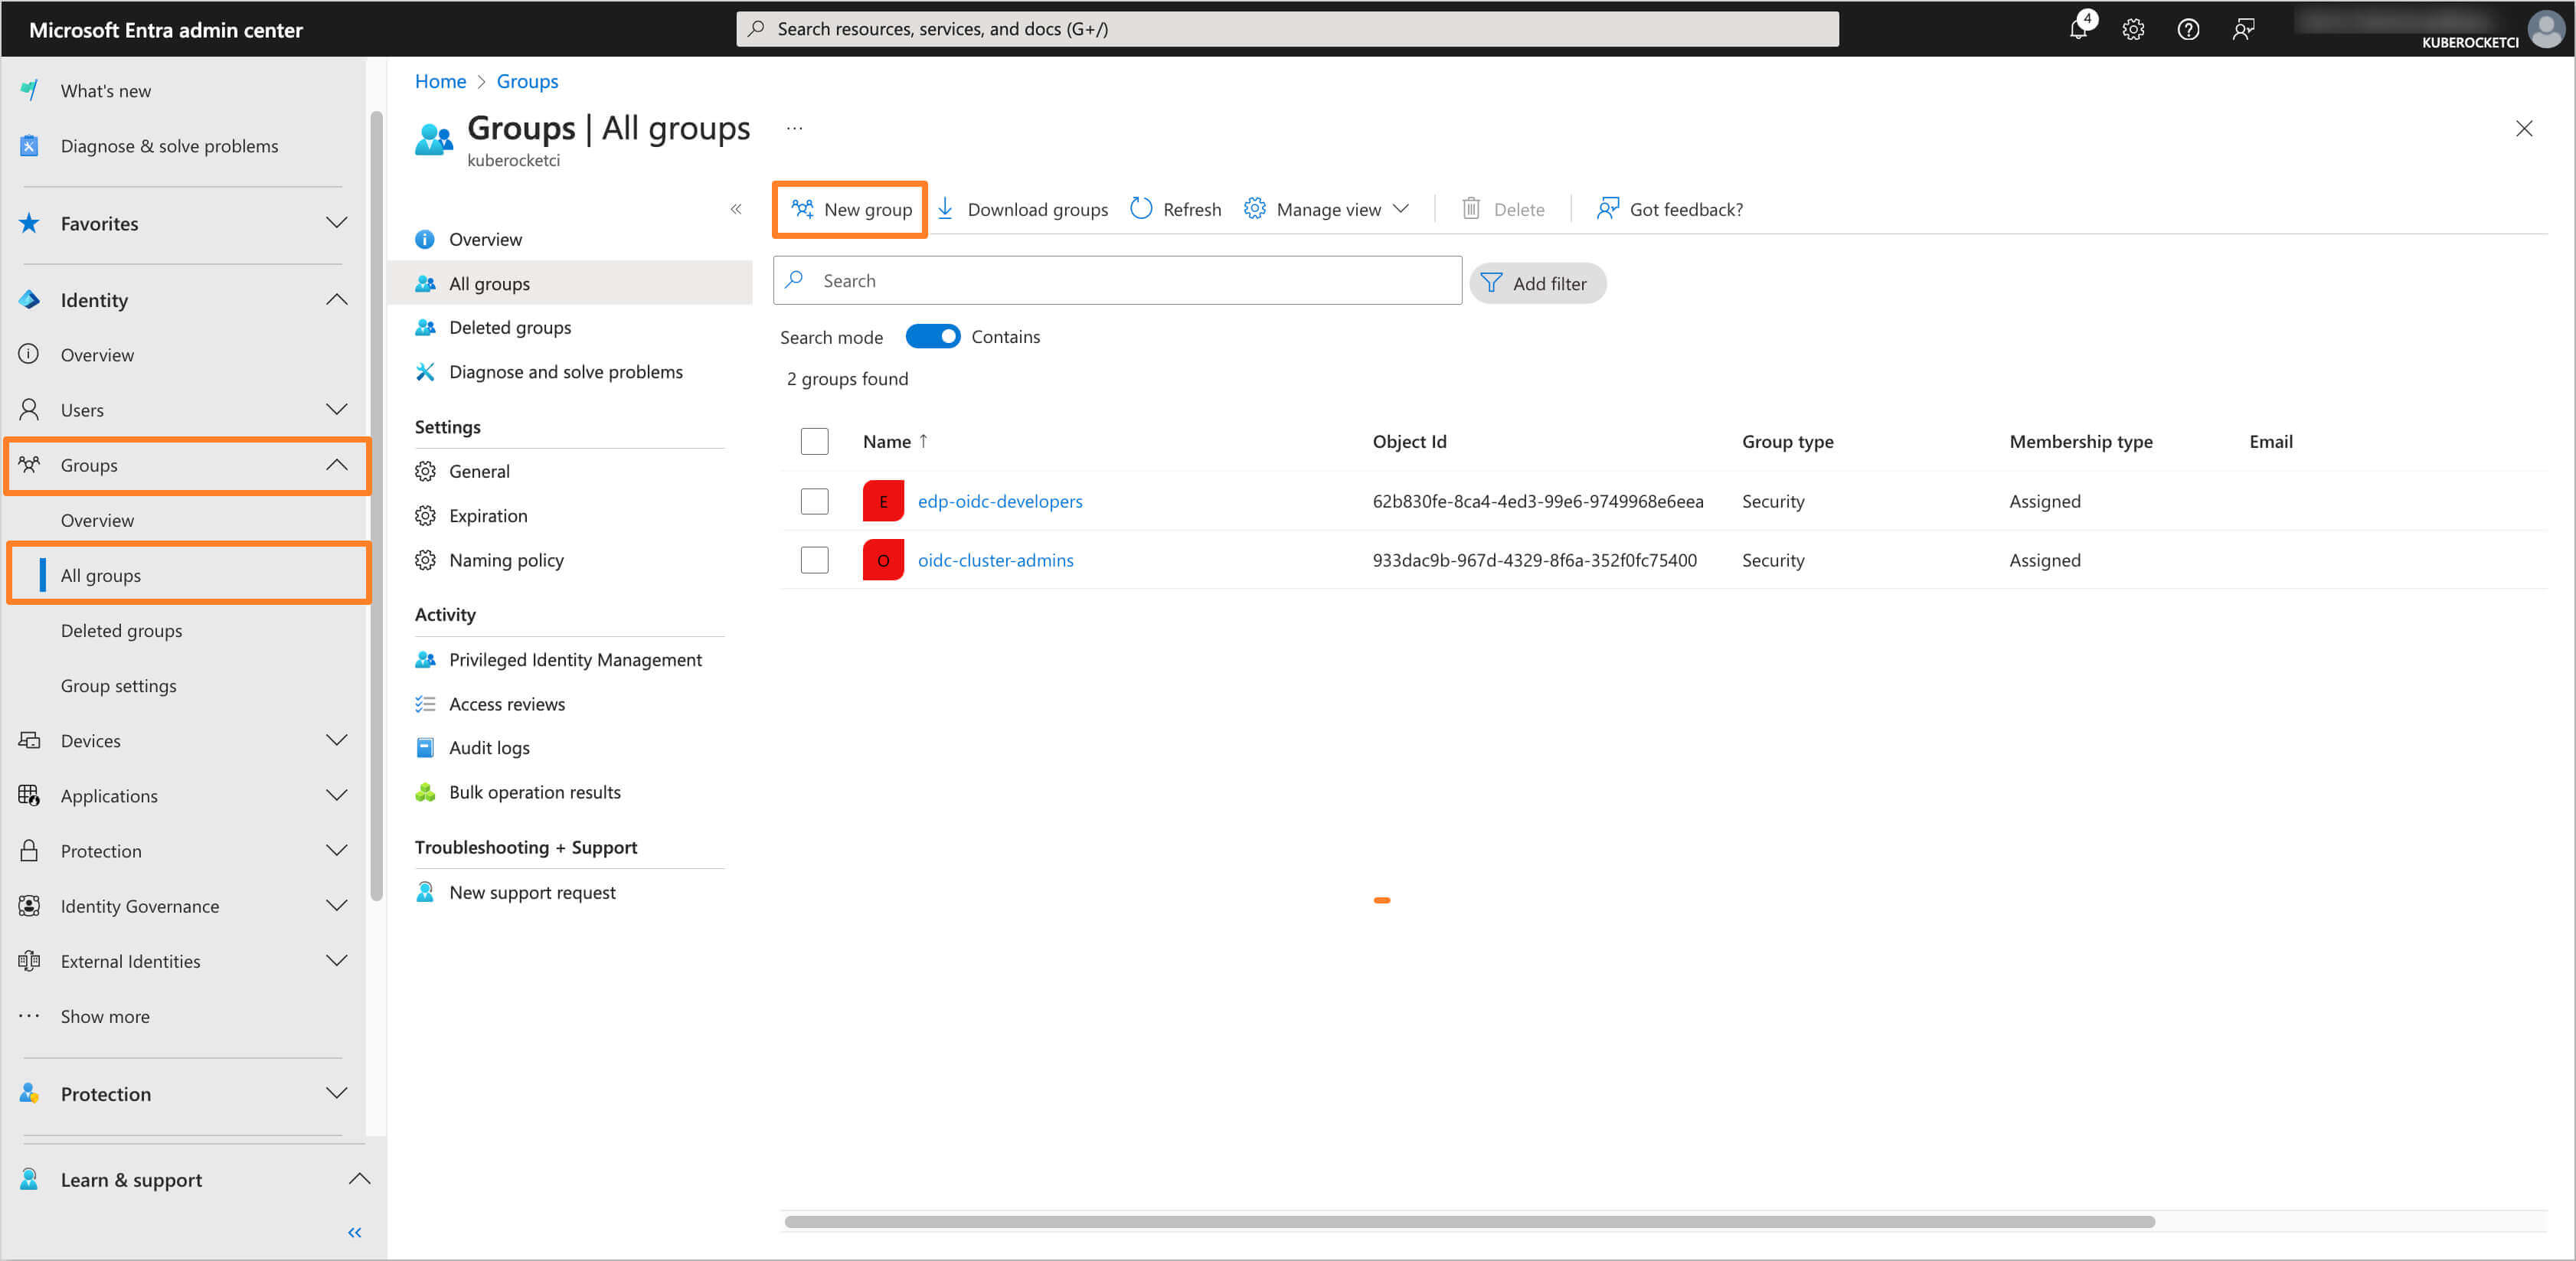
-
Fill in the required fields, such as Groups type and Group name. In the Members section, add users who will be part of the group.
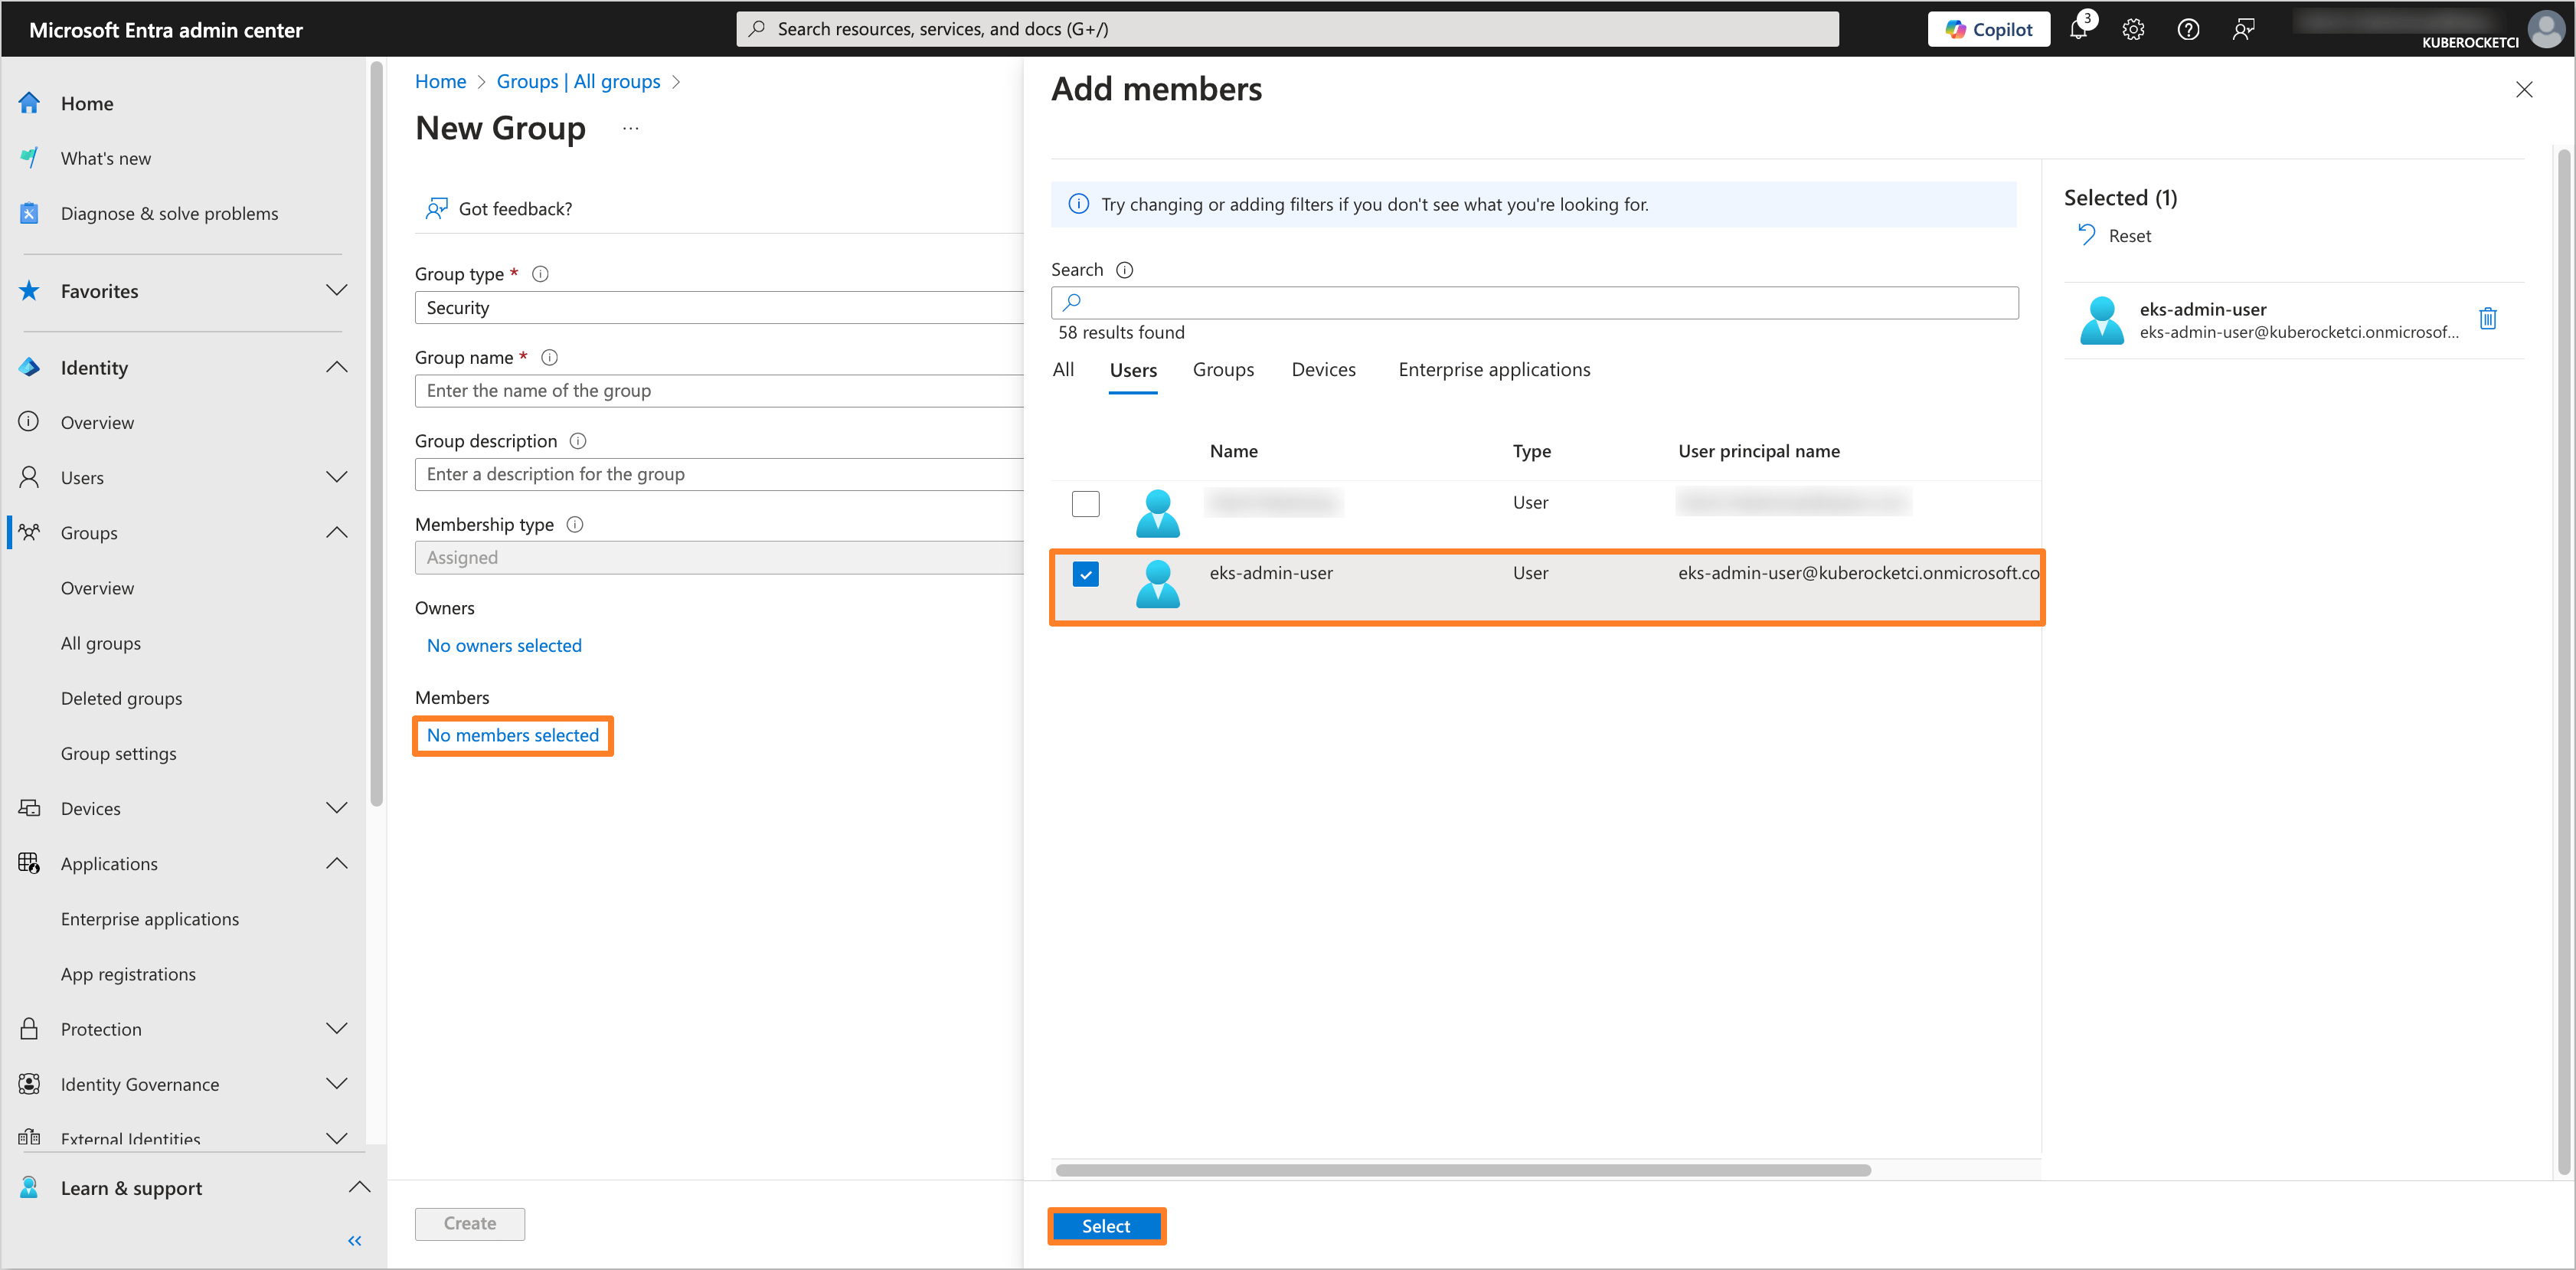
-
Click on the Create button and repeat this process for each required group.
Configuring the Argo CD Helm Chart for OIDC
To integrate Argo CD with configured Microsoft Entra Application, it is necessary to configure the Argo CD Helm chart. In this example, we will use the edp-cluster-add-ons repository to deploy Argo CD to the Kubernetes (e.g. AWS EKS) cluster.
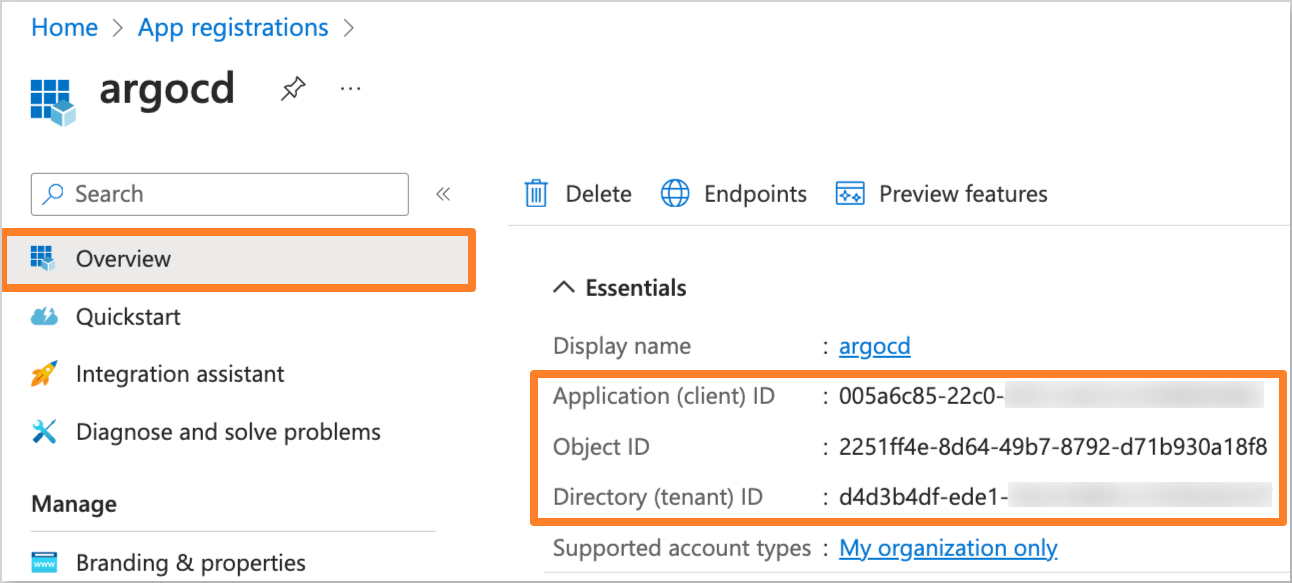
The Application data, such as Application (client) ID and Directory (tenant) ID, can be found in the Overview section of the Application in the Microsoft Entra Admin Center.
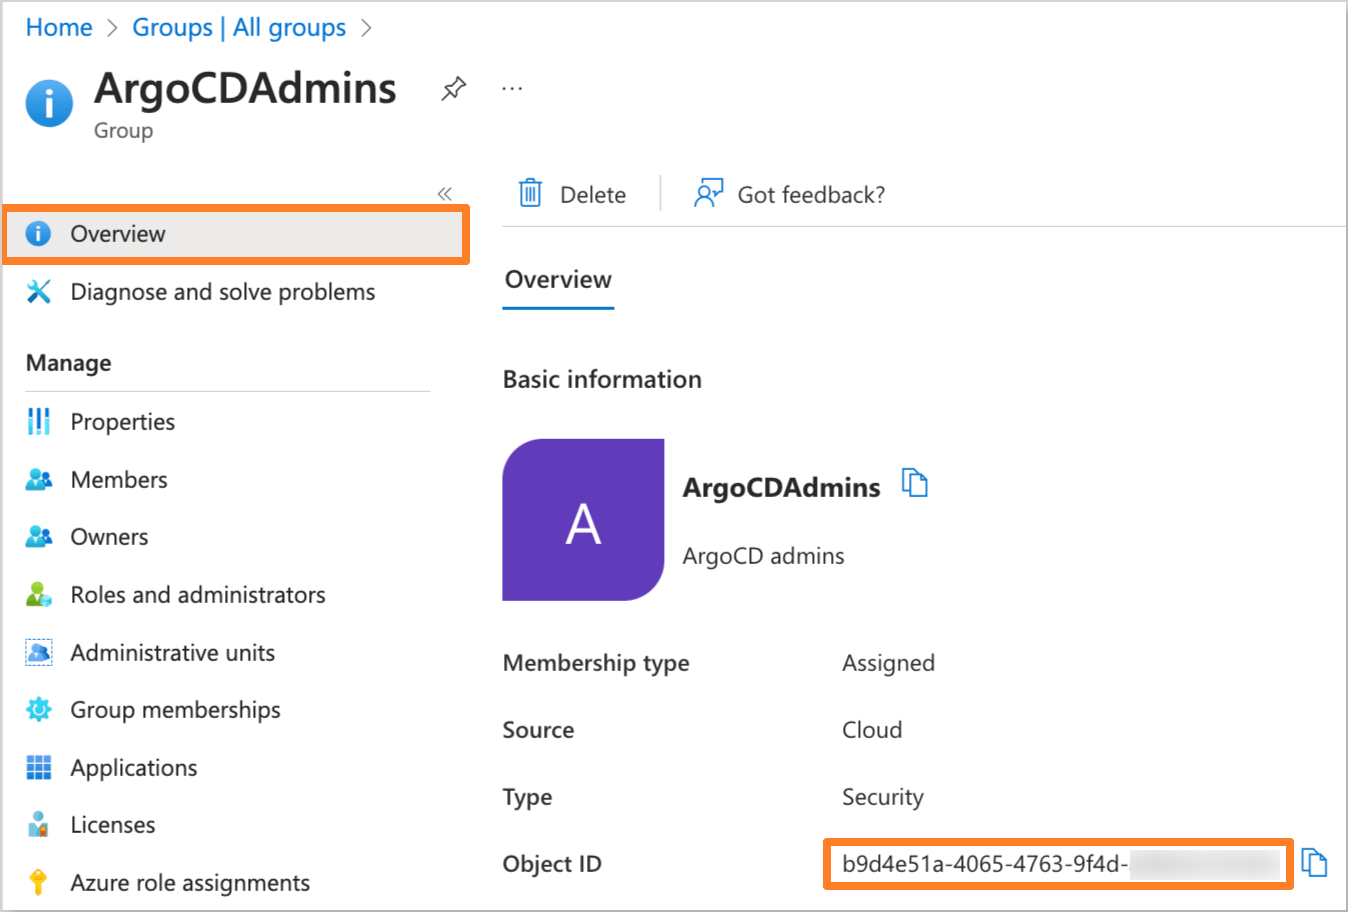
The Object ID can be found in the Overview section of the group in the Microsoft Entra Admin Center.
-
Navigate to the forked Cluster Add-Ons repository and locate the
values.yamlfile in theargo-cddirectory:Update the
values.yamlfile with the following values:argo-cd/values.yamlargo-cd:configs:cm:url: "https://<Argo CD URL>"application.instanceLabelKey: argocd.argoproj.io/instance-edpexec.enabled: trueoidc.config: |name: Entraissuer: https://login.microsoftonline.com/<Directory (tenant) ID>/v2.0clientID: <Application (client) ID>clientSecret: $keycloak-client-argocd-secret:clientSecretrequestedIDTokenClaims:groups:essential: truevalue: "SecurityGroup"requestedScopes:- openid- profile- emailrbac:scopes: '[groups, email]'policy.csv: |# default global adminsg, "<Object ID of ArgoCDAdmins group>", role:admin# Default global developersg, "<Object ID of ArgoCDReadOnly group>", role:readonlyReplace the following placeholders with the actual values:
<Argo CD URL>- Endpoint of the Argo CD.<Directory (tenant) ID>- Directory (tenant) ID of the Microsoft Entra Tenant.<Application (client) ID>- Application (client) ID from the Microsoft Entra Application settings.<Object ID of ArgoCDAdmins group>- Object ID of the ArgoCDAdmins group created in the Microsoft Entra Admin Center.<Object ID of ArgoCDReadOnly group>- Object ID of the ArgoCDReadOnly group created in the Microsoft Entra Admin Center.
-
Update or create the
keycloak-client-argocd-secretsecret with the Application Client Secret value:-
Using External Secrets Operator
Be sure to update the AWS Parameter Store object path specified in the
argo-cd/values.yamlfile in theeso.secretNamefield with the Application Client Secret value.AWS Parameter Store object{"clientSecret": "<Application Client secret>"} -
Manual approach
Create the
keycloak-client-argocd-secretsecret manually using the following template:keycloak-client-argocd-secret.yamlapiVersion: v1kind: Secretmetadata:name: keycloak-client-argocd-secretnamespace: <namespace>label:app.kubernetes.io/part-of: argocddata:clientSecret: <Application Client secret>
-
-
After updating the
values.yamlfile, commit the changes to the repository and apply the changes with Helm or Argo CD. -
Navigate to the Microsoft Entra Application and add the Redirect URI in the Authentication section if you haven't done it before:
noteThe Redirect URI should be in the format
https://<Argo CD URL>/auth/callback.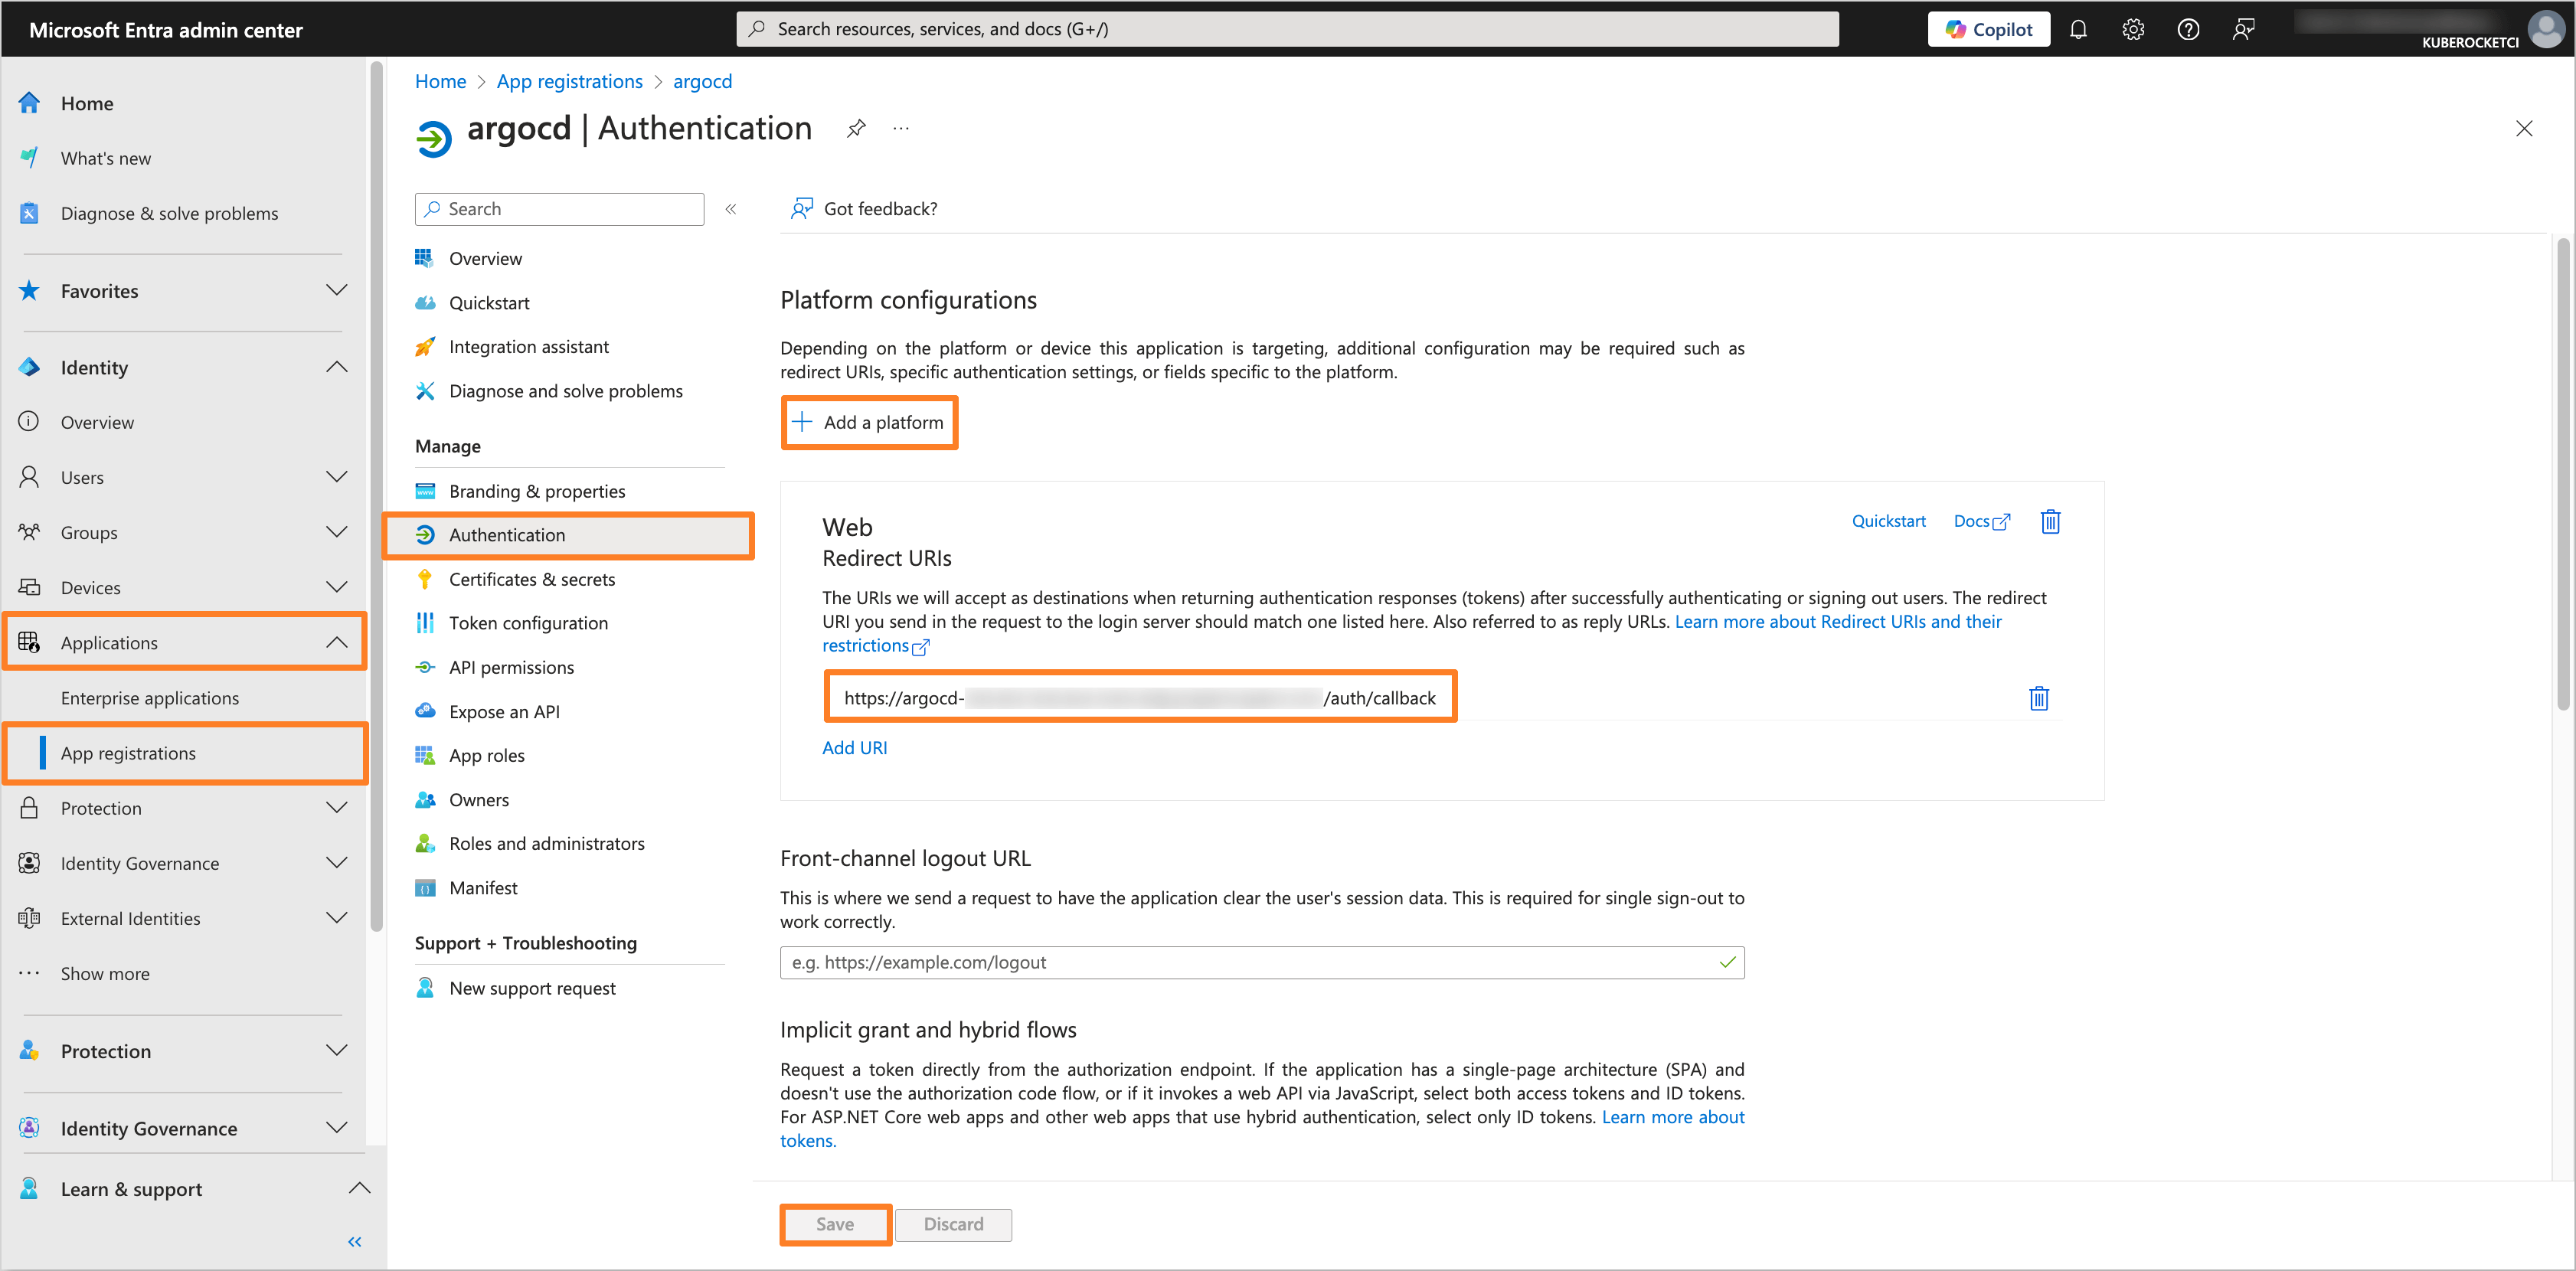
-
Verify that the OIDC authentication is configured correctly by logging in to Argo CD using the Log in via Entra option:
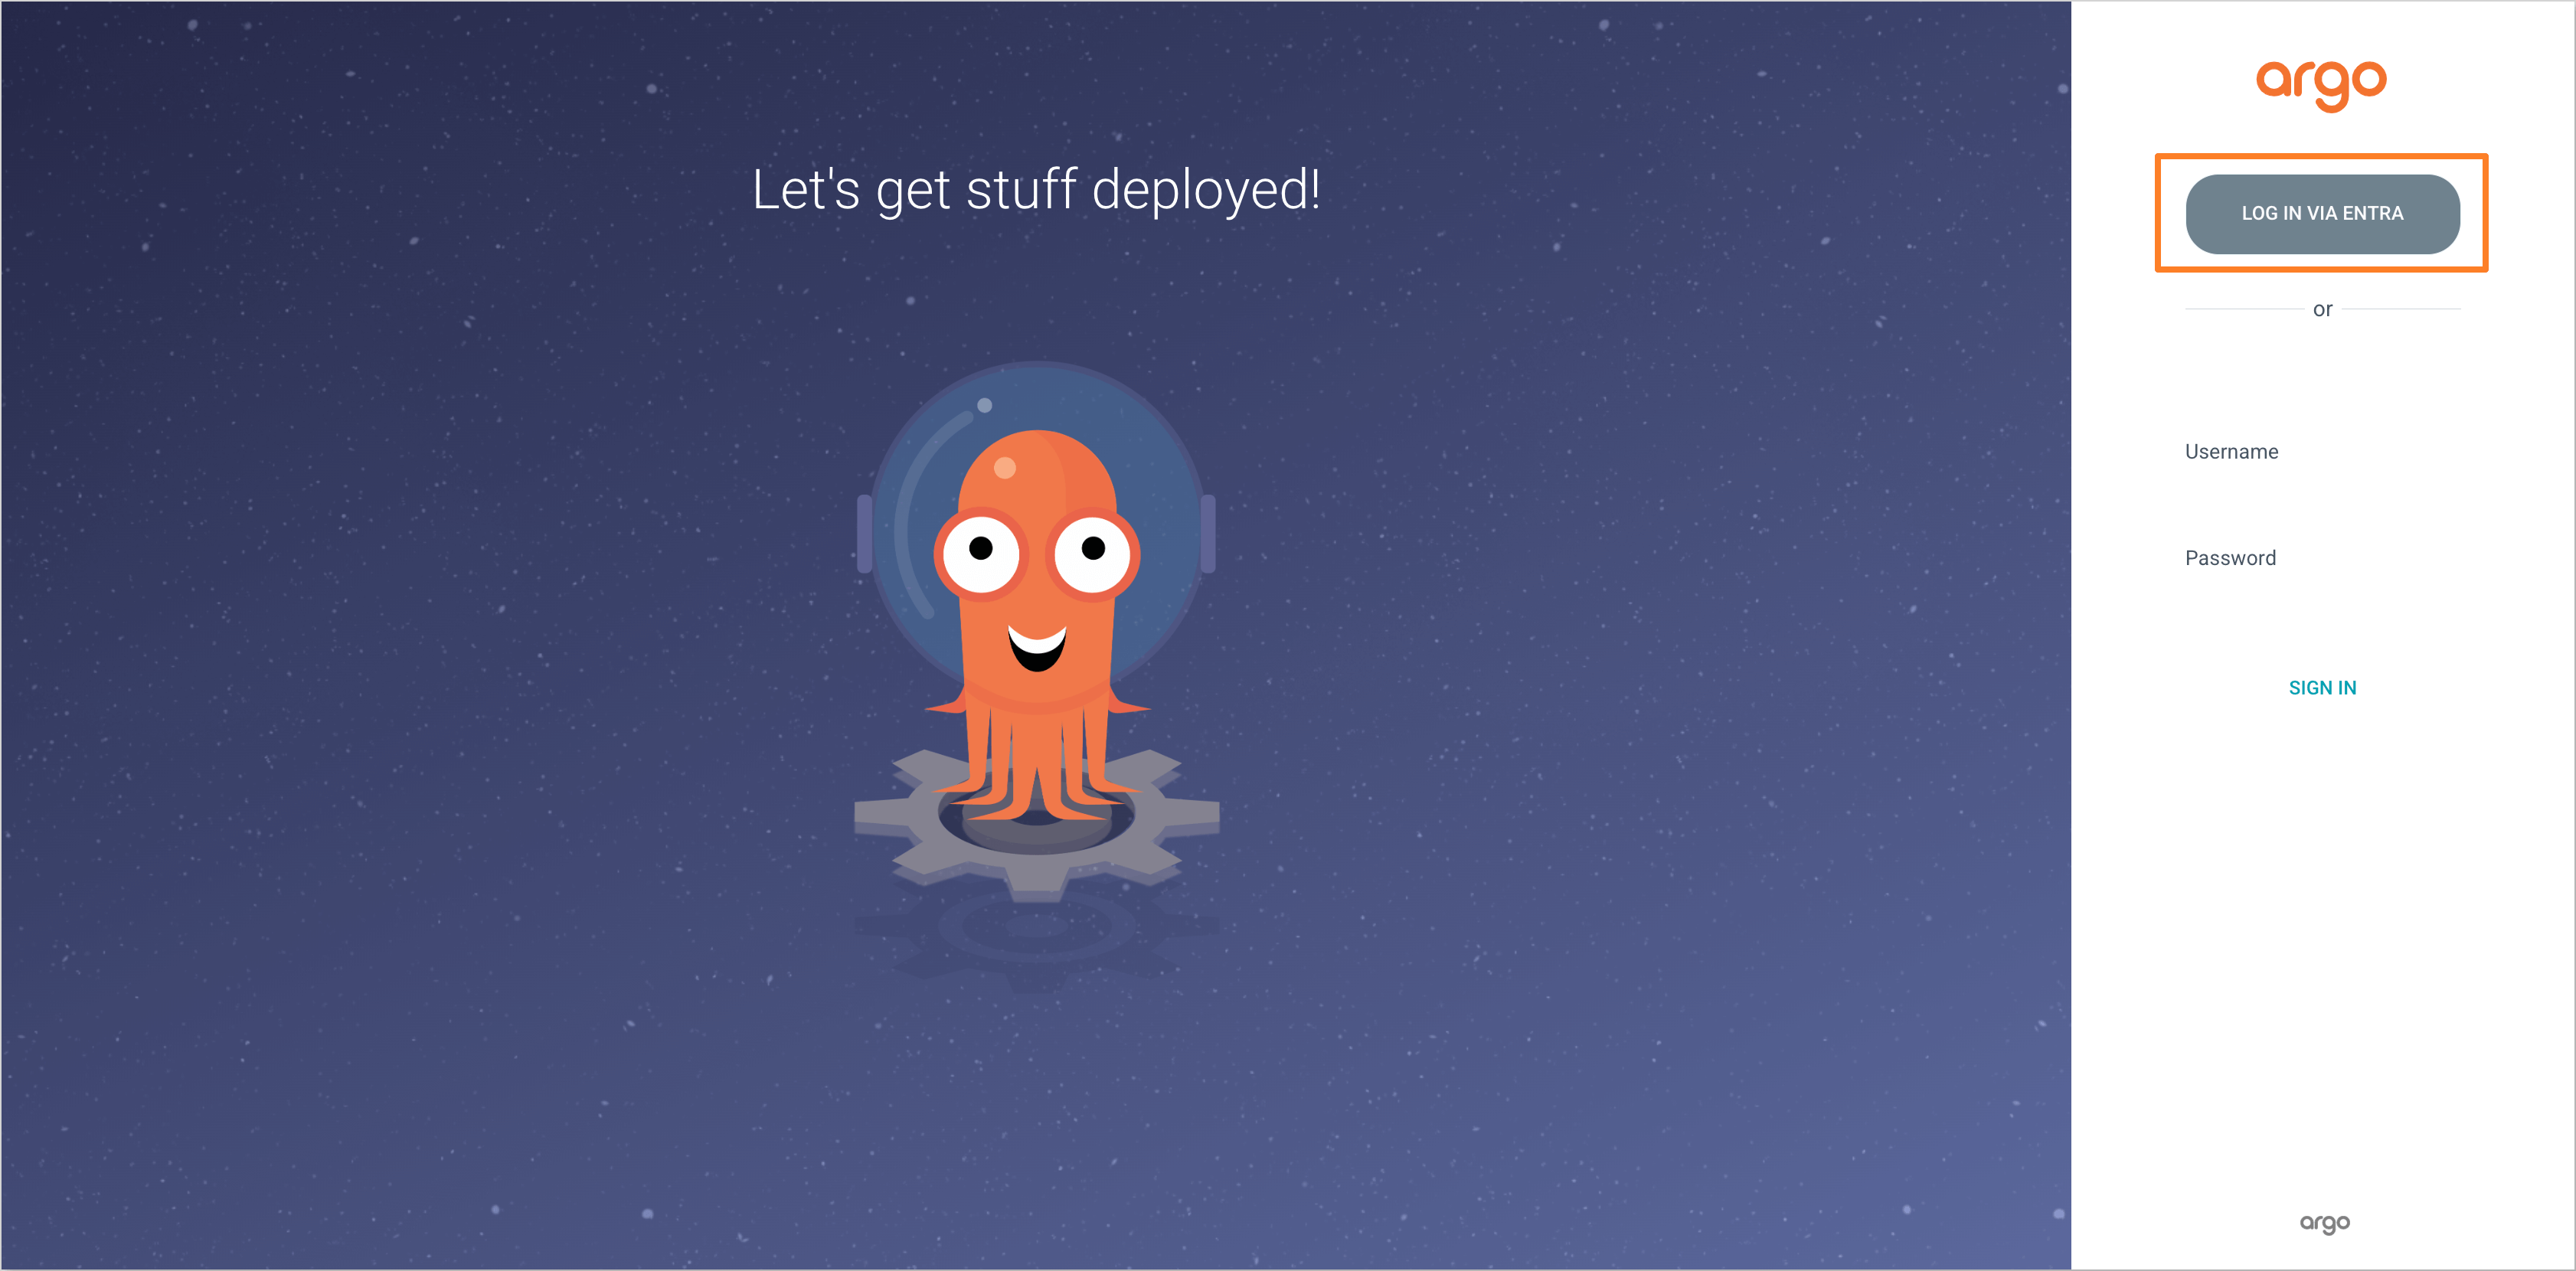
After completing these steps, the Argo CD will be configured to use Microsoft Entra as the Identity Provider for authentication. Users will be able to log in to the Argo CD using their Microsoft Entra credentials.
Troubleshooting Argo CD SSO with Microsoft Entra
If the login flow fails after completing the steps above, check the following common causes:
- Error
AADSTS50011(redirect URI mismatch) after clicking Log in via Entra. The Redirect URI registered in the Authentication section of the Microsoft Entra Application must exactly matchhttps://<Argo CD URL>/auth/callback, including the scheme and any trailing path. Update the application registration and retry. - Login succeeds, but the user sees no applications or projects. Argo CD RBAC did not match any group. Verify that the groups claim is added in the Token configuration section with the Group ID type, that the group Object ID used in the Argo CD RBAC policy matches the group in Microsoft Entra, and that
scopesin the Helm values includesgroups. invalid client credentialsor an endless login loop. The client secret has expired or the secret Secret ID was copied instead of the secret Value. Generate a new client secret in Certificates & secrets and update the secret referenced by the Argo CD Helm chart.- The groups claim is missing for some users. When a user belongs to a large number of groups, Microsoft Entra replaces the group list in the token with an overage claim, and Argo CD cannot evaluate it. Use dedicated, smaller groups for Argo CD access.
To inspect the exact OIDC error, check the argocd-server pod logs while reproducing the login attempt.