Install KubeRocketCI
To install KubeRocketCI, deploy Tekton as the CI engine prerequisite and then install the platform itself with Helm on any Kubernetes cluster. This quick start walks through both steps and ends with your first login to the KubeRocketCI Portal — no prior platform experience required.
Install Tekton
KubeRocketCI relies on Tekton resources, including Tasks, Pipelines, Triggers, and Interceptors to execute CI/CD pipelines.
To install Tekton, run the commands below:
kubectl apply -f https://infra.tekton.dev/tekton-releases/pipeline/previous/v1.6.2/release.yaml
kubectl apply -f https://infra.tekton.dev/tekton-releases/triggers/previous/v0.36.0/release.yaml
kubectl apply -f https://infra.tekton.dev/tekton-releases/triggers/previous/v0.36.0/interceptors.yaml
Install platform
To deploy the platform, follow the steps below:
-
Add a Helm Chart repository:
helm repo add epamedp https://epam.github.io/edp-helm-charts/stablehelm repo update -
Deploy the platform using the
helm installcommand:helm install krci epamedp/edp-install --version 3.15.0 --create-namespace --atomic -n krci --set global.dnsWildCard=example.com -
Upon successful deployment of the KubeRocketCI Helm Chart, run the
kubectl port-forwardcommand:kubectl port-forward service/krci-portal 59480:80 -n krci -
Enter the localhost in your browser to access the login menu and click Use Token:
localhost:59480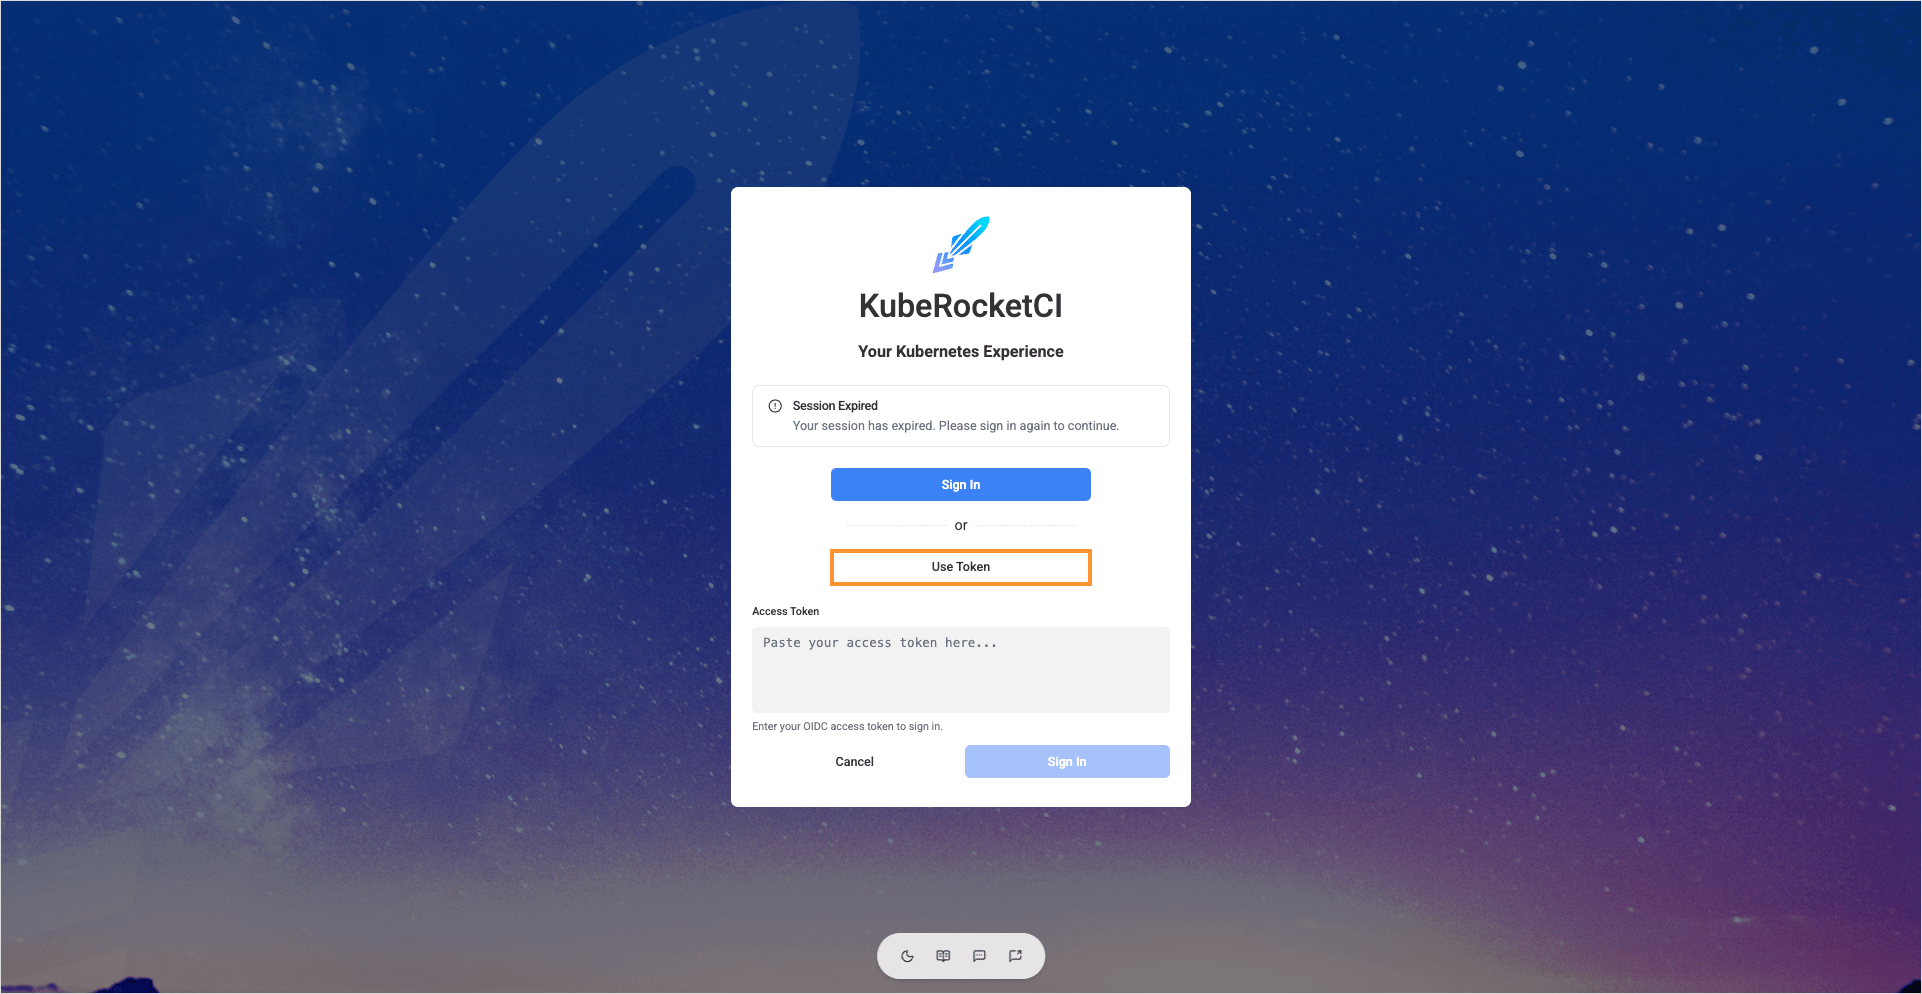
-
Create the edp-admin service account and generate an access token to open the KubeRocketCI:
kubectl -n krci create serviceaccount edp-adminkubectl create clusterrolebinding edp-admin --serviceaccount=krci:edp-admin --clusterrole=cluster-adminkubectl create token edp-admin -n krci -
In the login menu, paste the generated token in the Access token field and click the Sign in button.
-
Upon logging in, open the namespaces window by clicking the Manage Namespaces button in the top right corner of the page:
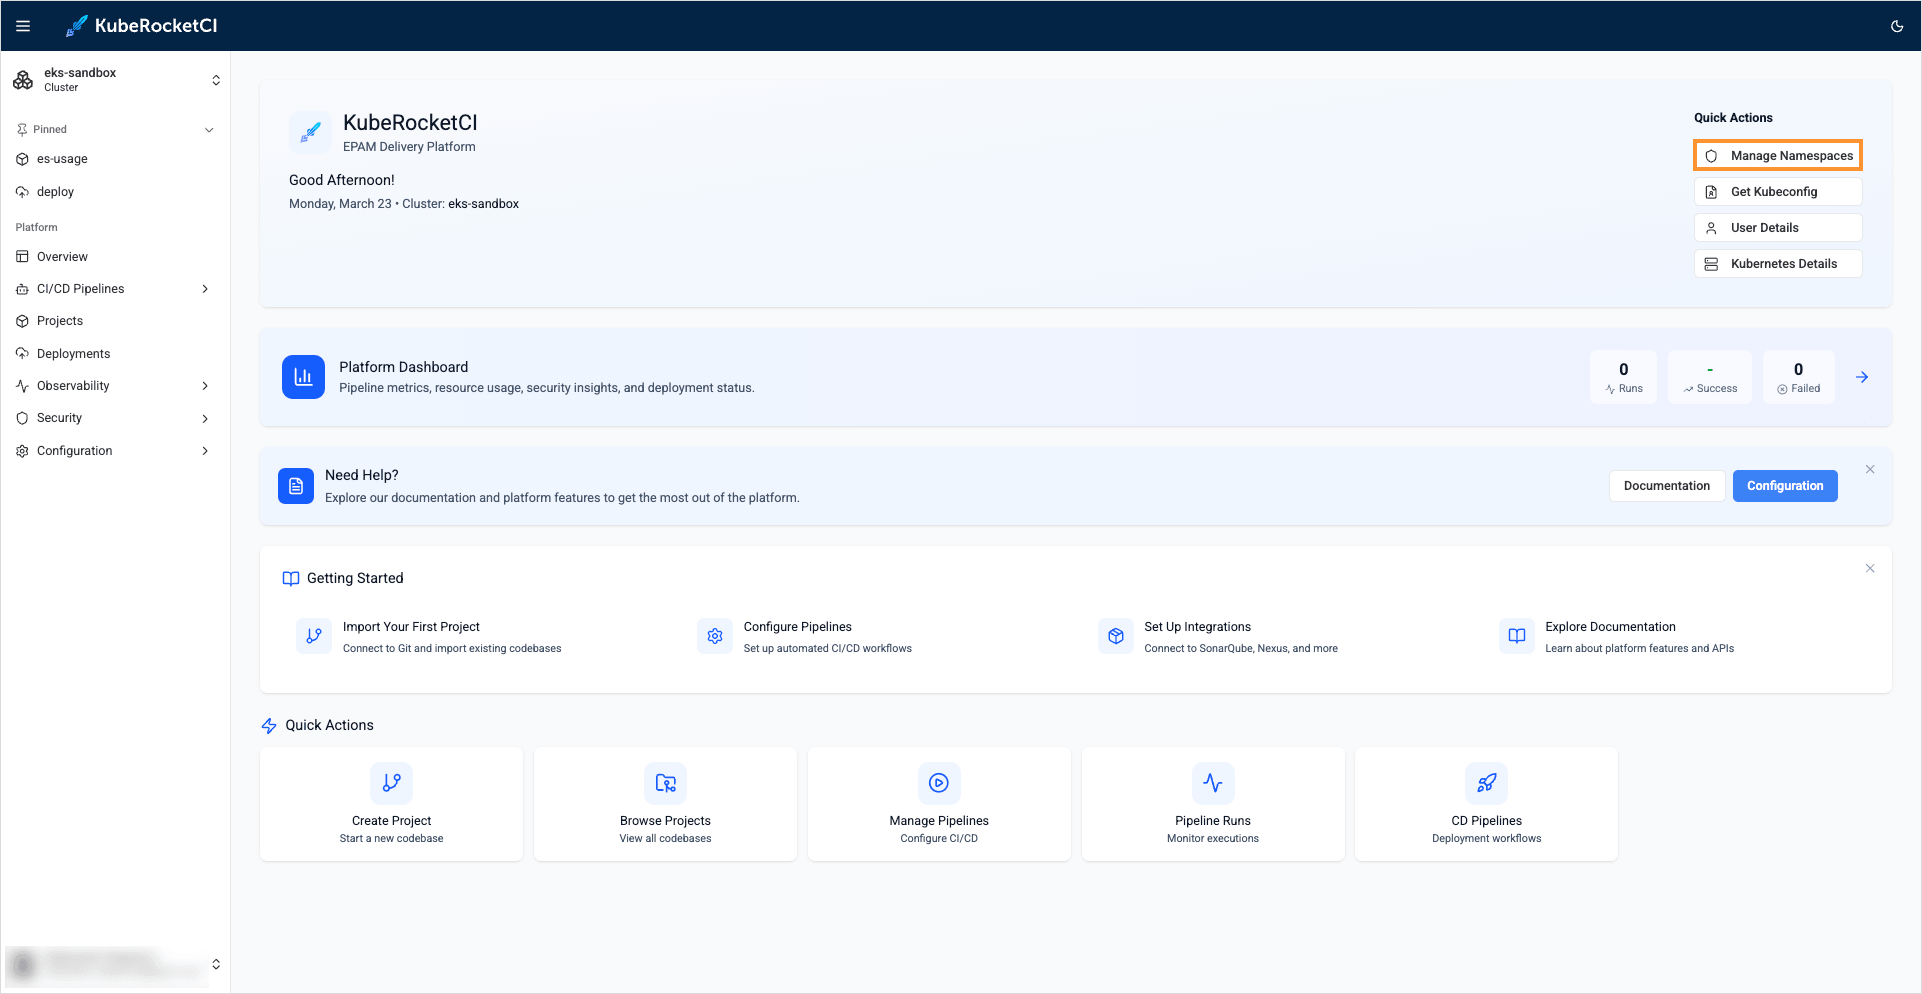
-
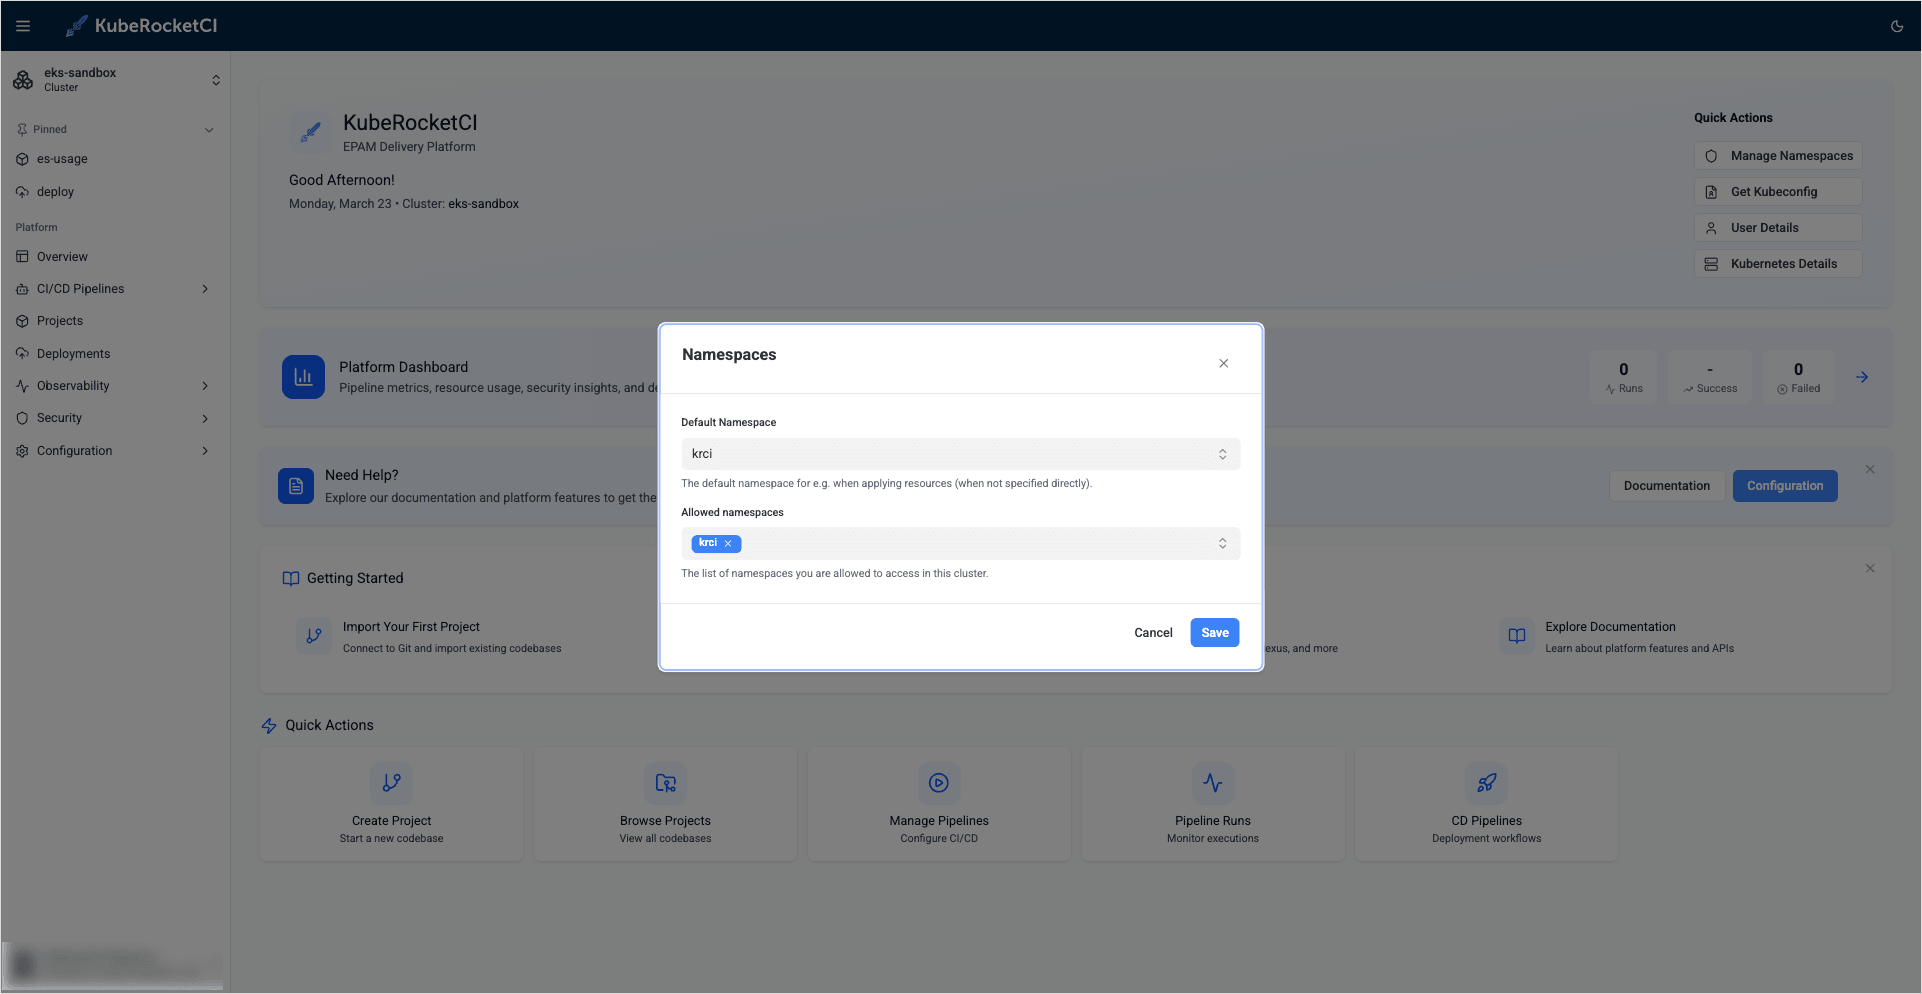
Ensure the
krcinamespace is specified in both default and allowed namespaces. If not, define them manually:- Default namespace:
krci - Allowed namespaces:
krci
 note
noteRemember to press Enter to add the allowed namespace to the list.
- Default namespace:
After completing these steps, you will gain access to KubeRocketCI components through the KubeRocketCI portal. You can now proceed with the integration steps, starting with the SonarQube integration.