Integrate DefectDojo
Install DefectDojo on Kubernetes with Helm and integrate it into KubeRocketCI pipelines for vulnerability management. Once installed, you can enable single sign-on by following the DefectDojo Microsoft Entra OIDC SSO Setup guide.
It is also possible to install DefectDojo using the add-ons approach. For details, please refer to the KubeRocketCI addons approach.
For details on how KubeRocketCI pipelines report findings to DefectDojo, including the data model, engagement naming, and scan types, refer to Security Scanning Pipelines. For the runtime findings of the cluster workloads, refer to Runtime Security Findings in DefectDojo.
Prerequisites
- Kubectl version 1.34.0+ is installed. Please refer to the Kubernetes official website for details.
- Helm version 3.19.0+ is installed. Please refer to the Helm page on GitHub for details.
- DefectDojo 3.5.200 is the tested and recommended version; earlier versions may work but are not tested.
Installation
Please refer to the DefectDojo Helm Chart, which ships the application with its PostgreSQL database and Valkey message broker, and the DefectDojo Helm chart 1.9.70 README for details.
Installation DefectDojo Cluster Add-On Approach
To install DefectDojo in environment, it's recommended to use the resources provided in the Cluster Add-Ons repository. Leveraging the Cluster Add-Ons simplifies the deployment and management process, providing a streamlined method to integrate DefectDojo into infrastructure.
-
Navigate to the forked cluster Add-Ons repository and align the defectdojo values.yaml file. Follow the instructions to deploy DefectDojo.
-
Update the configuration to enable DefectDojo in Add-Ons repository:
clusters/core/apps/values.yamldefectdojo:createNamespace: trueenable: true -
Sync resources and wait till the all DefectDojo resources is created:

Installation DefectDojo Helm Chart Approach
-
Check that a security namespace is created. If not, run the following command to create it:
kubectl create namespace defectdojoFor the OpenShift usersWhen using the OpenShift platform, install the
SecurityContextConstraintsresource. In case of using a custom namespace fordefectdojo, change the namespace in theuserssection.View: defectdojo-scc.yaml
allowHostDirVolumePlugin: falseallowHostIPC: falseallowHostNetwork: falseallowHostPID: falseallowHostPorts: falseallowPrivilegeEscalation: trueallowPrivilegedContainer: falseallowedCapabilities: nullapiVersion: security.openshift.io/v1allowedFlexVolumes: []defaultAddCapabilities: []fsGroup:type: MustRunAsranges:- min: 999max: 65543groups: []kind: SecurityContextConstraintsmetadata:annotations:"helm.sh/hook": "pre-install"name: defectdojopriority: 1readOnlyRootFilesystem: falserequiredDropCapabilities:- KILL- MKNOD- SETUID- SETGIDrunAsUser:type: MustRunAsRangeuidRangeMin: 1uidRangeMax: 65543seLinuxContext:type: MustRunAssupplementalGroups:type: RunAsAnyusers:- system:serviceaccount:defectdojo:defectdojo- system:serviceaccount:defectdojo:defectdojo-valkey- system:serviceaccount:defectdojo:defaultvolumes:- configMap- downwardAPI- emptyDir- persistentVolumeClaim- projected- secret -
Add a chart repository:
helm repo add defectdojo 'https://raw.githubusercontent.com/DefectDojo/django-DefectDojo/helm-charts'helm repo update -
Create PostgreSQL admin secret:
kubectl -n defectdojo create secret generic defectdojo-postgresql-specific \--from-literal=postgresql-password=<postgresql_password> \--from-literal=postgresql-postgres-password=<postgresql_postgres_password>noteThe
postgresql_passwordandpostgresql_postgres_passwordpasswords must be 16 characters long. -
Create Valkey secret:
kubectl -n defectdojo create secret generic defectdojo-valkey-specific \--from-literal=valkey-password=<valkey_password>noteThe
valkey_passwordpassword must be 10 characters long. -
Create DefectDojo admin secret:
kubectl -n defectdojo create secret generic defectdojo \--from-literal=DD_ADMIN_PASSWORD=<dd_admin_password> \--from-literal=DD_SECRET_KEY=<dd_secret_key> \--from-literal=DD_CREDENTIAL_AES_256_KEY=<dd_credential_aes_256_key> \--from-literal=METRICS_HTTP_AUTH_PASSWORD=<metric_http_auth_password>noteThe
dd_admin_passwordpassword must be 22 characters long.The
dd_secret_keypassword must be 128 characters long.The
dd_credential_aes_256_keypassword must be 128 characters long.The
metric_http_auth_passwordpassword must be 32 characters long. -
Install DefectDojo 3.5.200 using the defectdojo/defectdojo Helm chart 1.9.70:
helm upgrade --install \defectdojo \--version 1.9.70 \defectdojo/defectdojo \--namespace defectdojo \--values values.yamlThe chart uses the DefectDojo images of its app version, 3.5.200, so the values.yaml file sets no image tag. Check out the values.yaml file sample of the DefectDojo customization:
View: values.yaml
fullnameOverride: defectdojohost: defectdojo.<ROOT_DOMAIN>siteUrl: https://defectdojo.<ROOT_DOMAIN>alternativeHosts:- defectdojo-django.defectdojoinitializer:# runs the database migrations on install and upgrade; keep it enabledrun: truedjango:ingress:enabled: true # change to 'false' for OpenShiftactivateTLS: false -
For the OpenShift platform, install a Route:
View: defectdojo-route.yaml
kind: RouteapiVersion: route.openshift.io/v1metadata:name: defectdojonamespace: defectdojospec:host: defectdojo.<ROOT_DOMAIN>path: /tls:insecureEdgeTerminationPolicy: Redirecttermination: edgeto:kind: Servicename: defectdojo-djangoport:targetPort: httpwildcardPolicy: None
Configuration DefectDojo ci-user
DefectDojo 3.5.200 has no global roles. A user gets access either as a staff user or as an authorized user of a Product Type, shown as an Organization in the UI. The KubeRocketCI pipelines write to the KubeRocketCI Organization by default. To prepare DefectDojo for integration with KubeRocketCI, follow the steps below:
-
Create the ci user in the DefectDojo UI:
-
Log in to the DefectDojo UI with the
admincredentials:echo "DefectDojo admin password: $(kubectl \get secret defectdojo \--namespace=defectdojo \--output jsonpath='{.data.DD_ADMIN_PASSWORD}' \| base64 --decode)" -
Go to Users, click New User, and create the user, for example
ci-user. -
Grant the user access with one of these options:
-
Staff user: select Staff status when you create the user. Only a superuser, such as
admin, can set it. -
Authorized user of the
KubeRocketCIOrganization: leave Staff status cleared. Go to Organizations -> Add Organization and create theKubeRocketCIOrganization. Open it, and in the Authorized Users panel, click Add Users and add the user.
-
warningWith the second option, create the
KubeRocketCIOrganization before the first pipeline run. A user without the staff status has access only to the Organizations that list it in Authorized Users. DefectDojo does not add the user there when its import creates the Organization. -
-
Get a token of the DefectDojo user:
-
Log in to the DefectDojo UI with the credentials of the user from the previous step.
-
Open the user menu and select API v2 Key.
-
Copy the API key.

-
Integration DefectDojo with KubeRocketCI
Provision the secret using KubeRocketCI portal, Manifest or with the externalSecrets operator:
- KubeRocketCI portal
- Manifest
- External Secrets Operator
Go to the Portal open Configuration -> SECURITY -> DEFECTDOJO. Update or click + ADD INTEGRATION fill fields Quick Link URL, URL and Token click the save button.

apiVersion: v1
kind: Secret
metadata:
  name: ci-defectdojo
  namespace: krci
  labels:
    app.edp.epam.com/secret-type: defectdojo
    app.edp.epam.com/integration-secret: "true"
stringData:
  url: https://defectdojo.example.com
  token: <token>
Store defectdojo URL and Token in AWS Parameter Store with following format:
"ci-defectdojo":
{
  "url": "https://defectdojo.example.com",
  "token": "XXXXXXXXXXXX"
}
Go to the Portal open Configuration -> SECURITY -> DefectDojo and see the Managed by External Secret message.
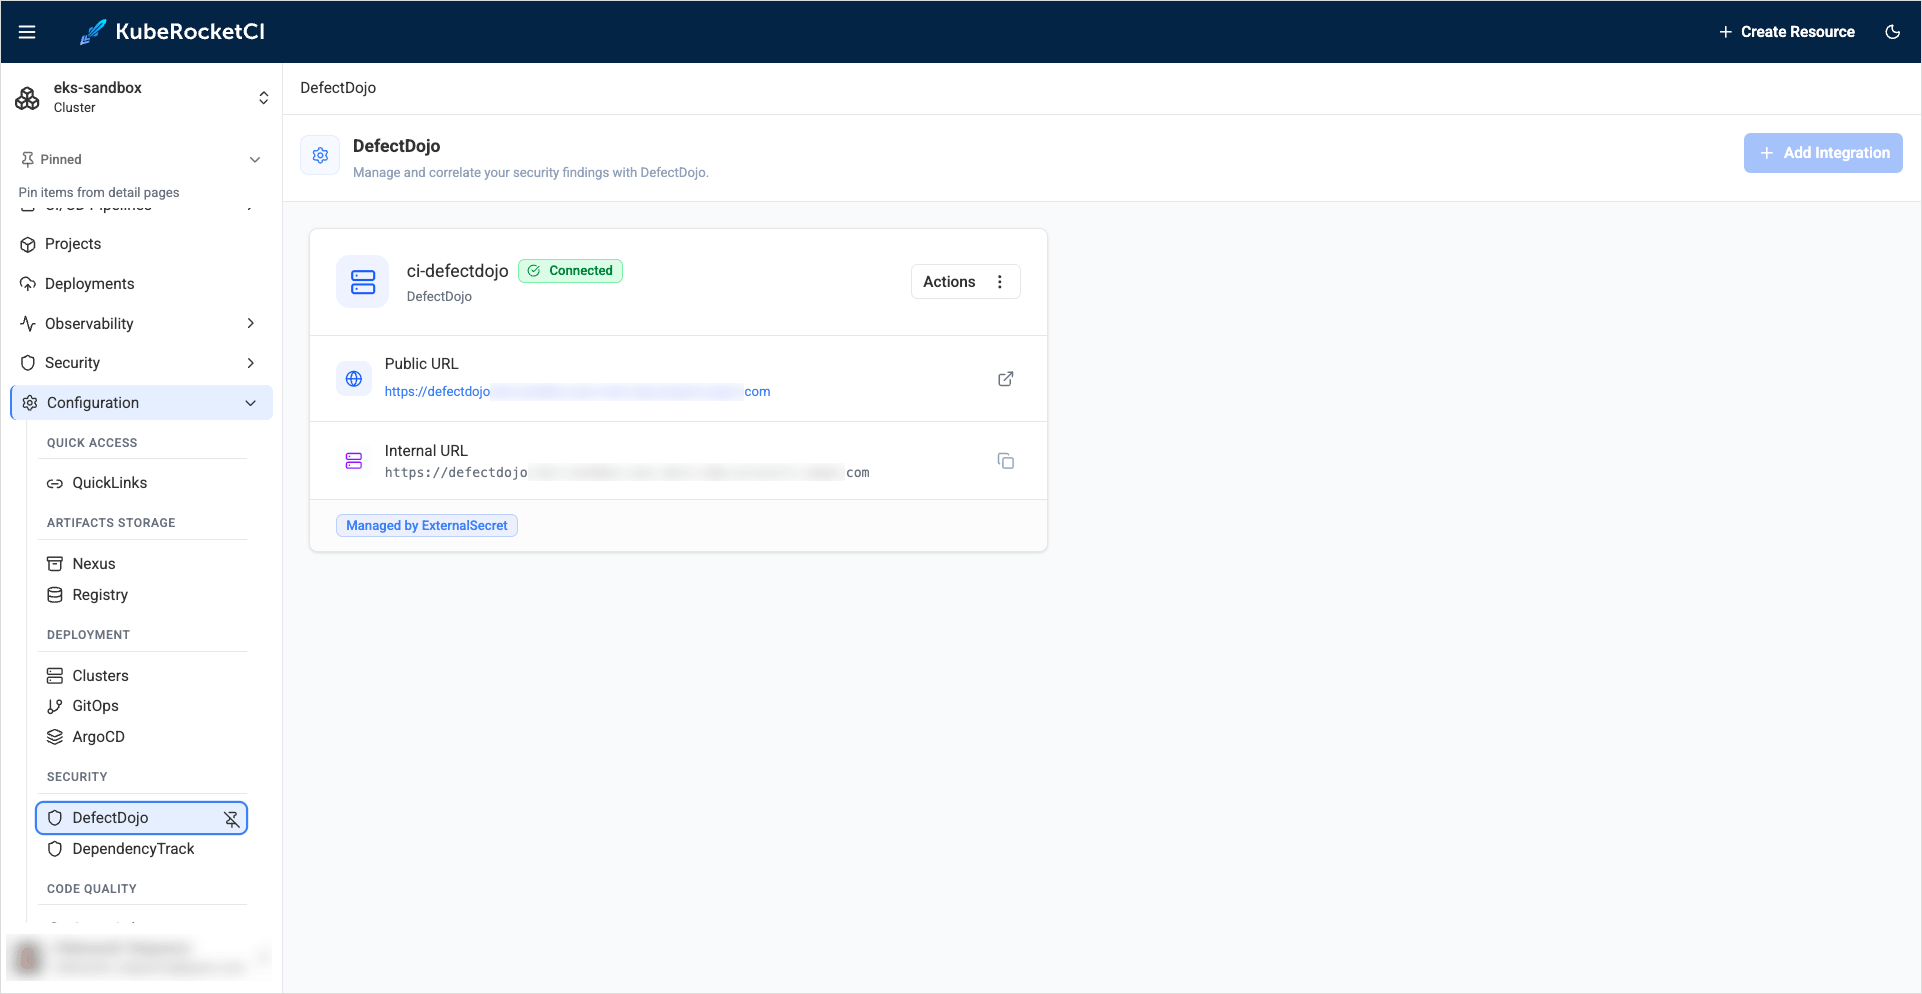
More details about the External Secrets Operator integration procedure can be found in the External Secrets Operator Integration page.
After following the instructions provided, you should be able to integrate your DefectDojo with the KubeRocketCI using one of the available scenarios.